

Espeto Diving · test center example
Center onboarding guide
Step-by-step instructions to register, create activities, set availability, connect Stripe, embed the widget, and manage bookings on Be Underwater Booking. Screens and examples use Espeto Diving as the test center.
Create your center account
Register Espeto Diving (or your real center) and start the onboarding flow.
This guide uses Espeto Diving as the example test center. Follow the same steps with your own center name.
Open registration
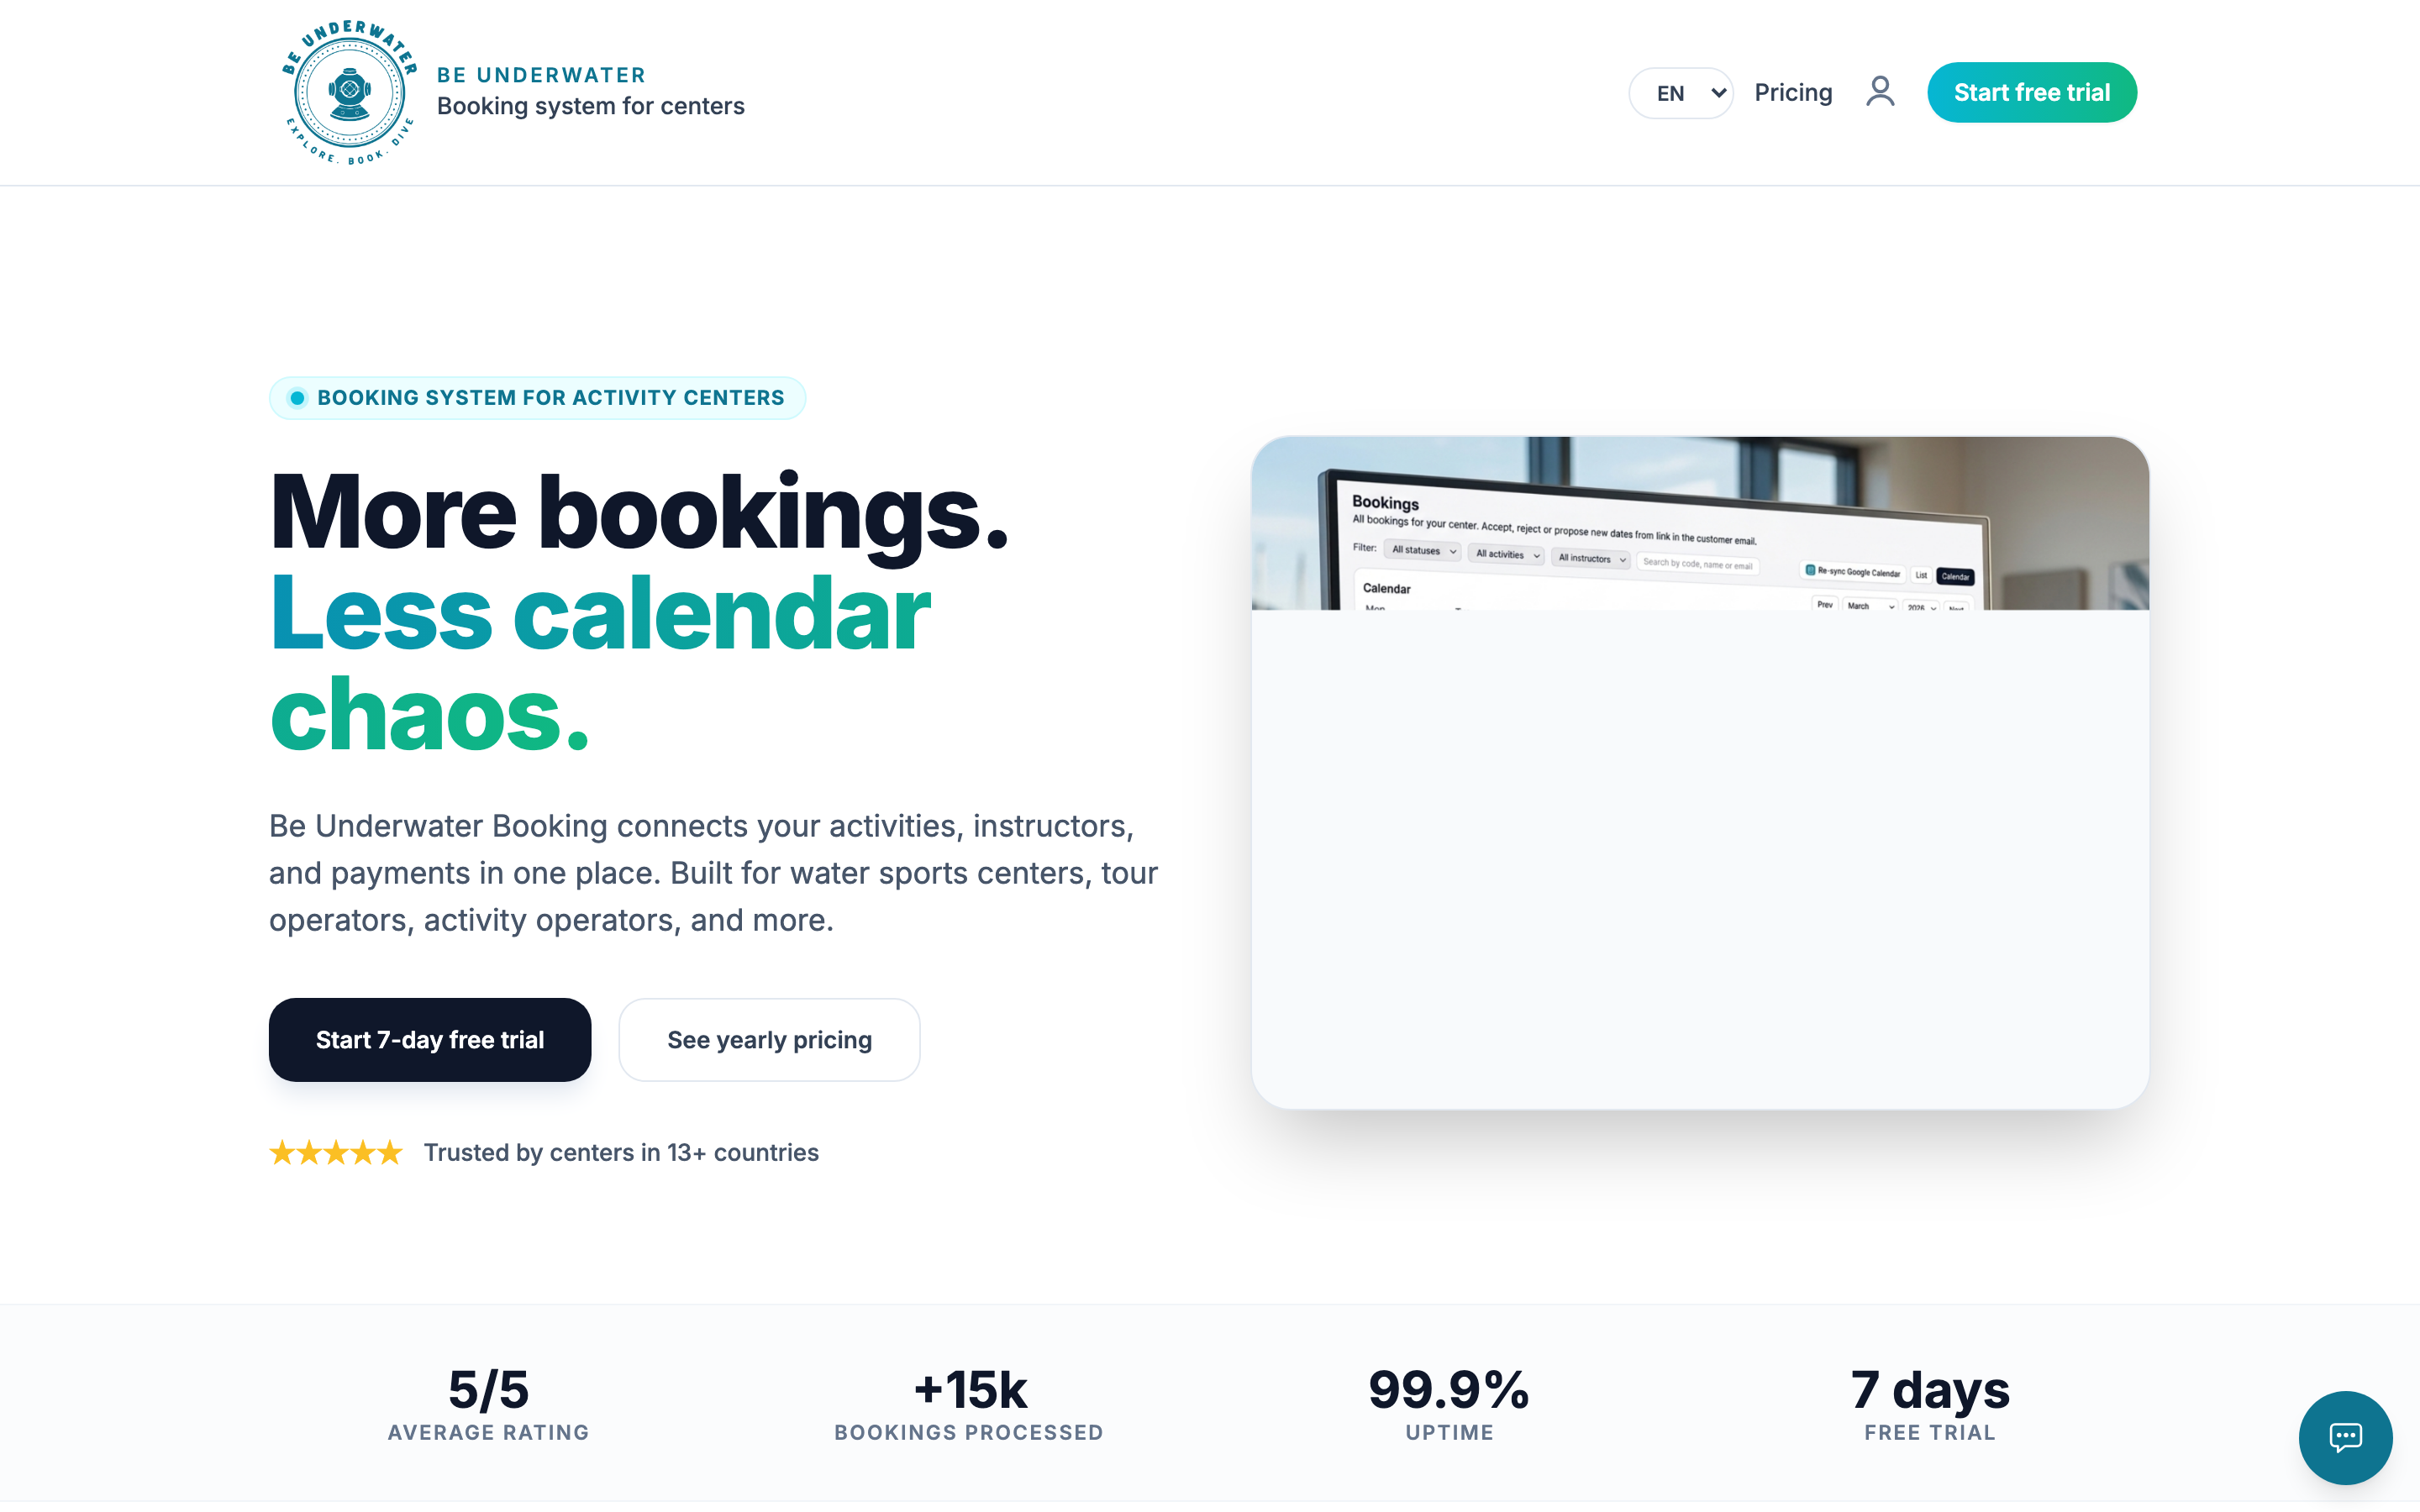
- Go to your booking app homepage (e.g. booking.beunderwater.com)
- Click Sign up or Start free trial in the navbar
- Or open /register directly
Fill in the form
- Email — e.g. espetodiving@hotmail.com for the test center
- Password — at least 8 characters
- Center name — e.g. Espeto Diving
- Accept the Terms of Service and Privacy Policy
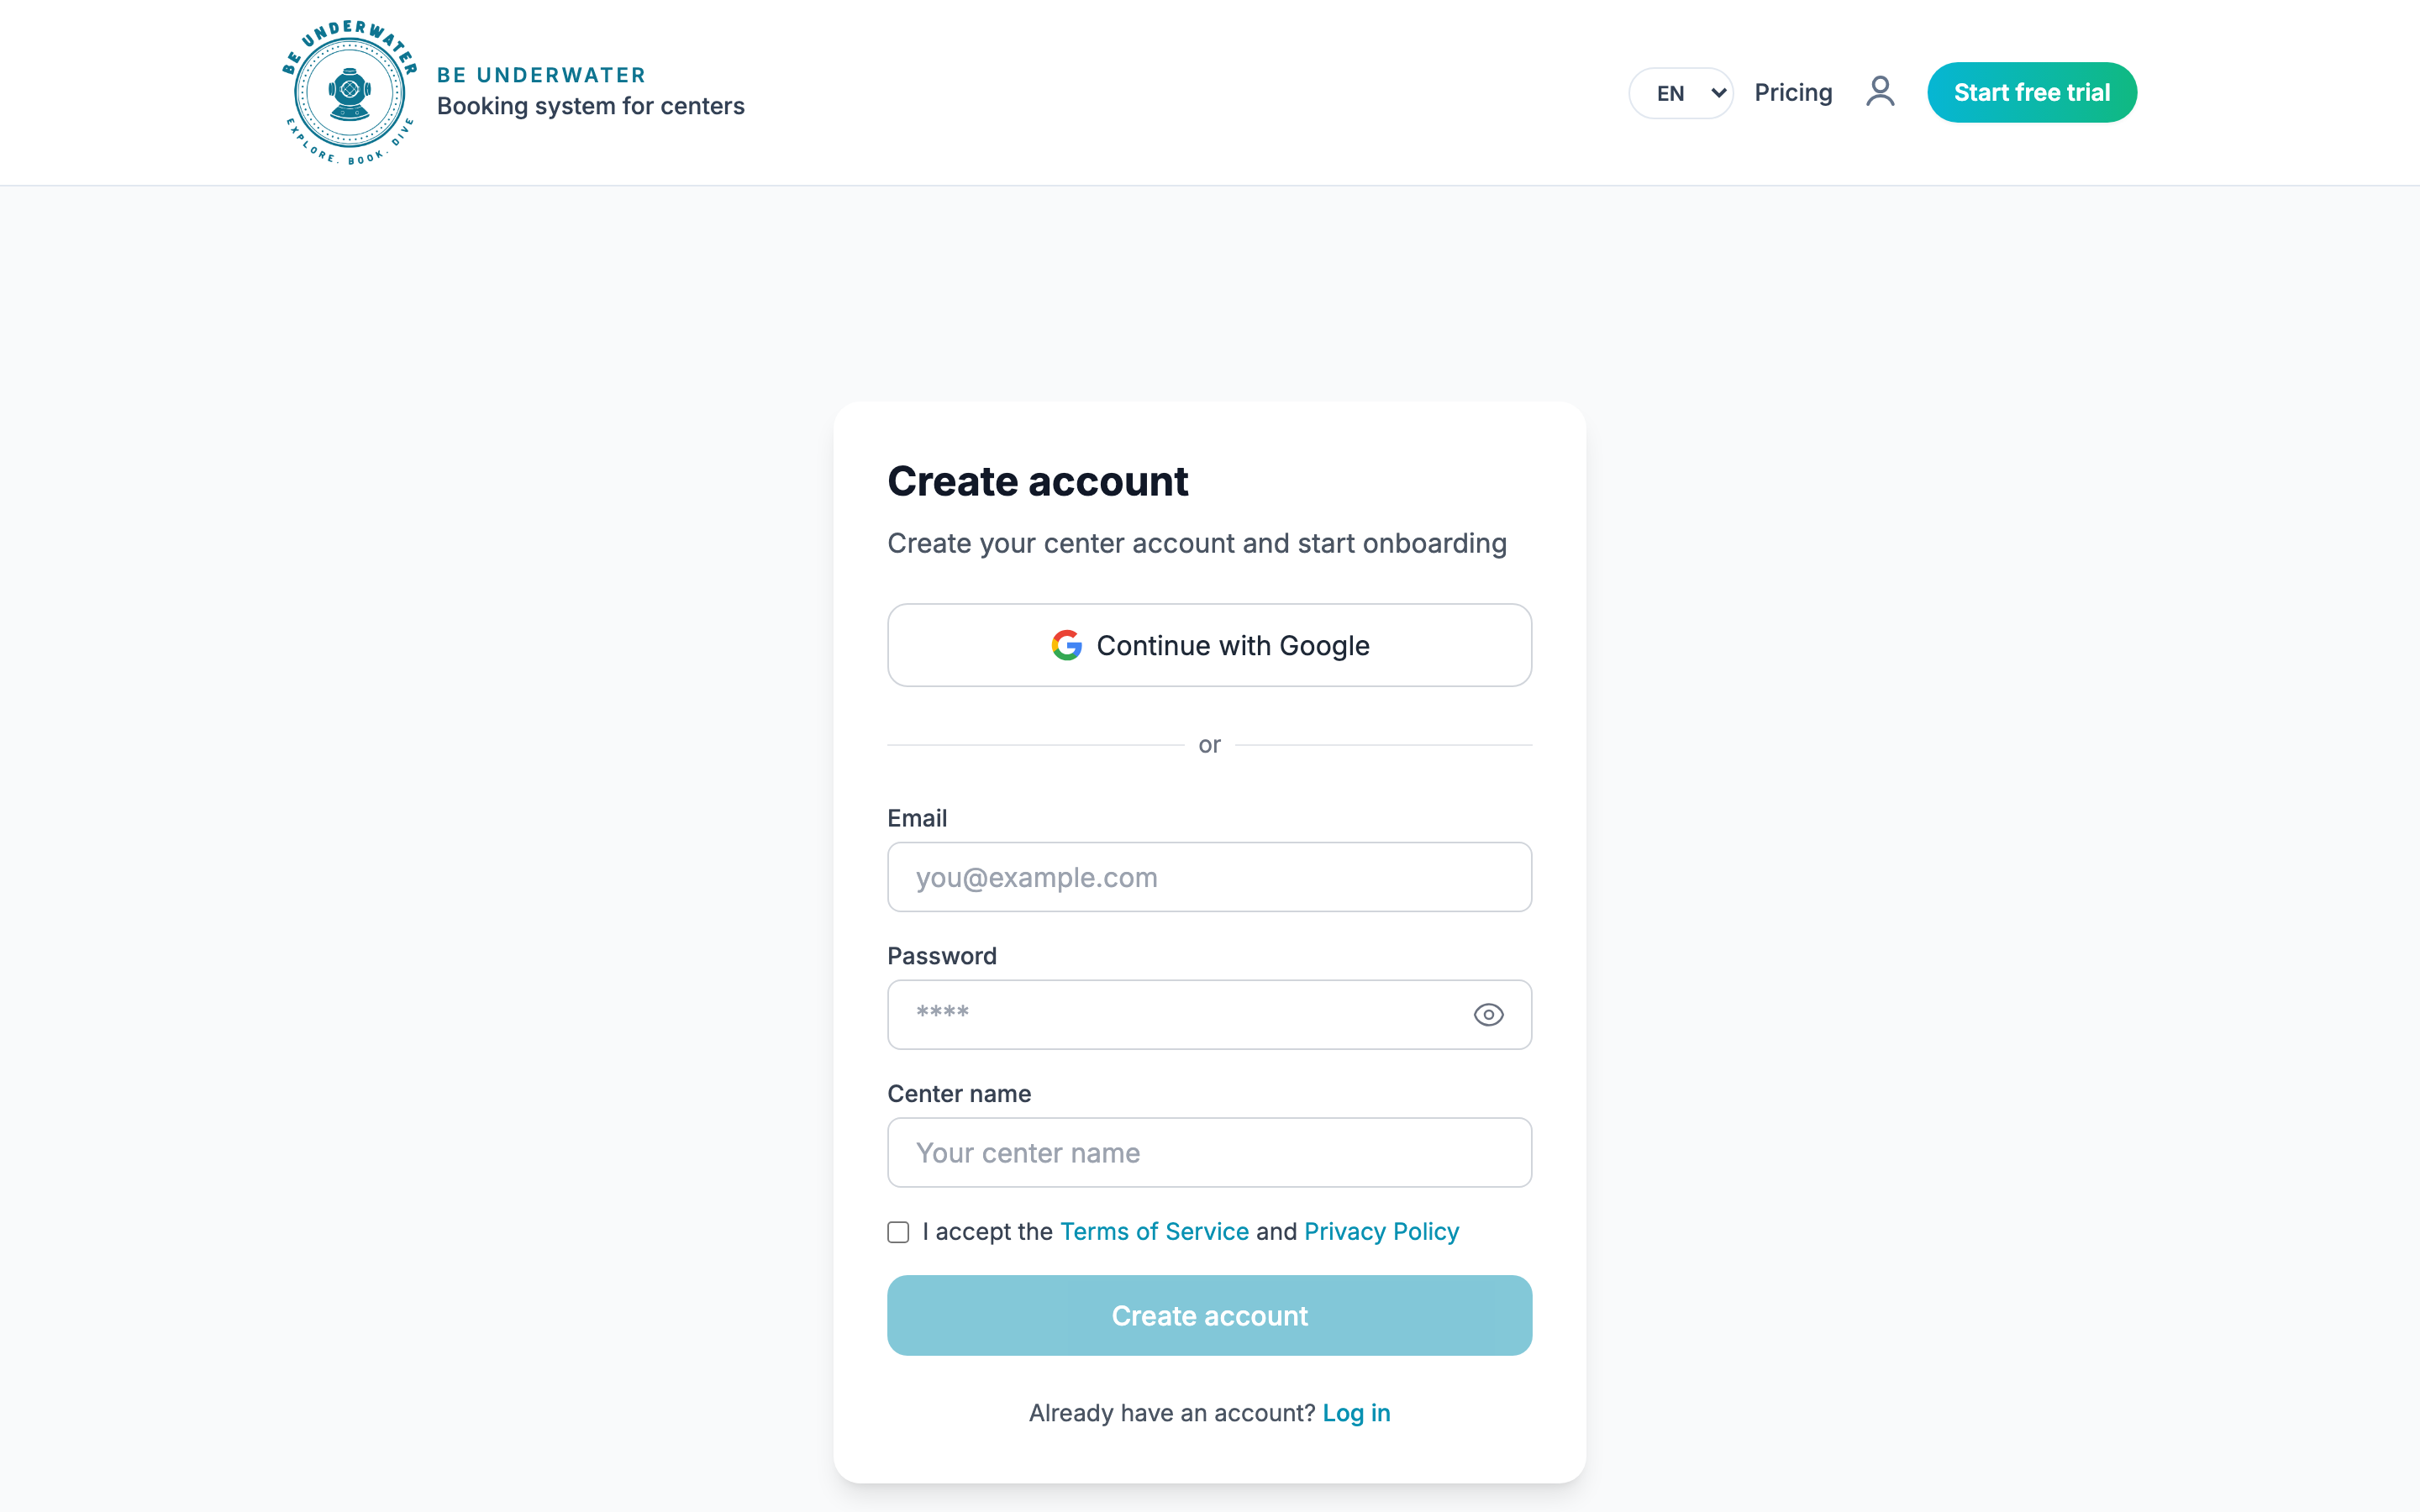
You can also click Continue with Google to register with a Google account.
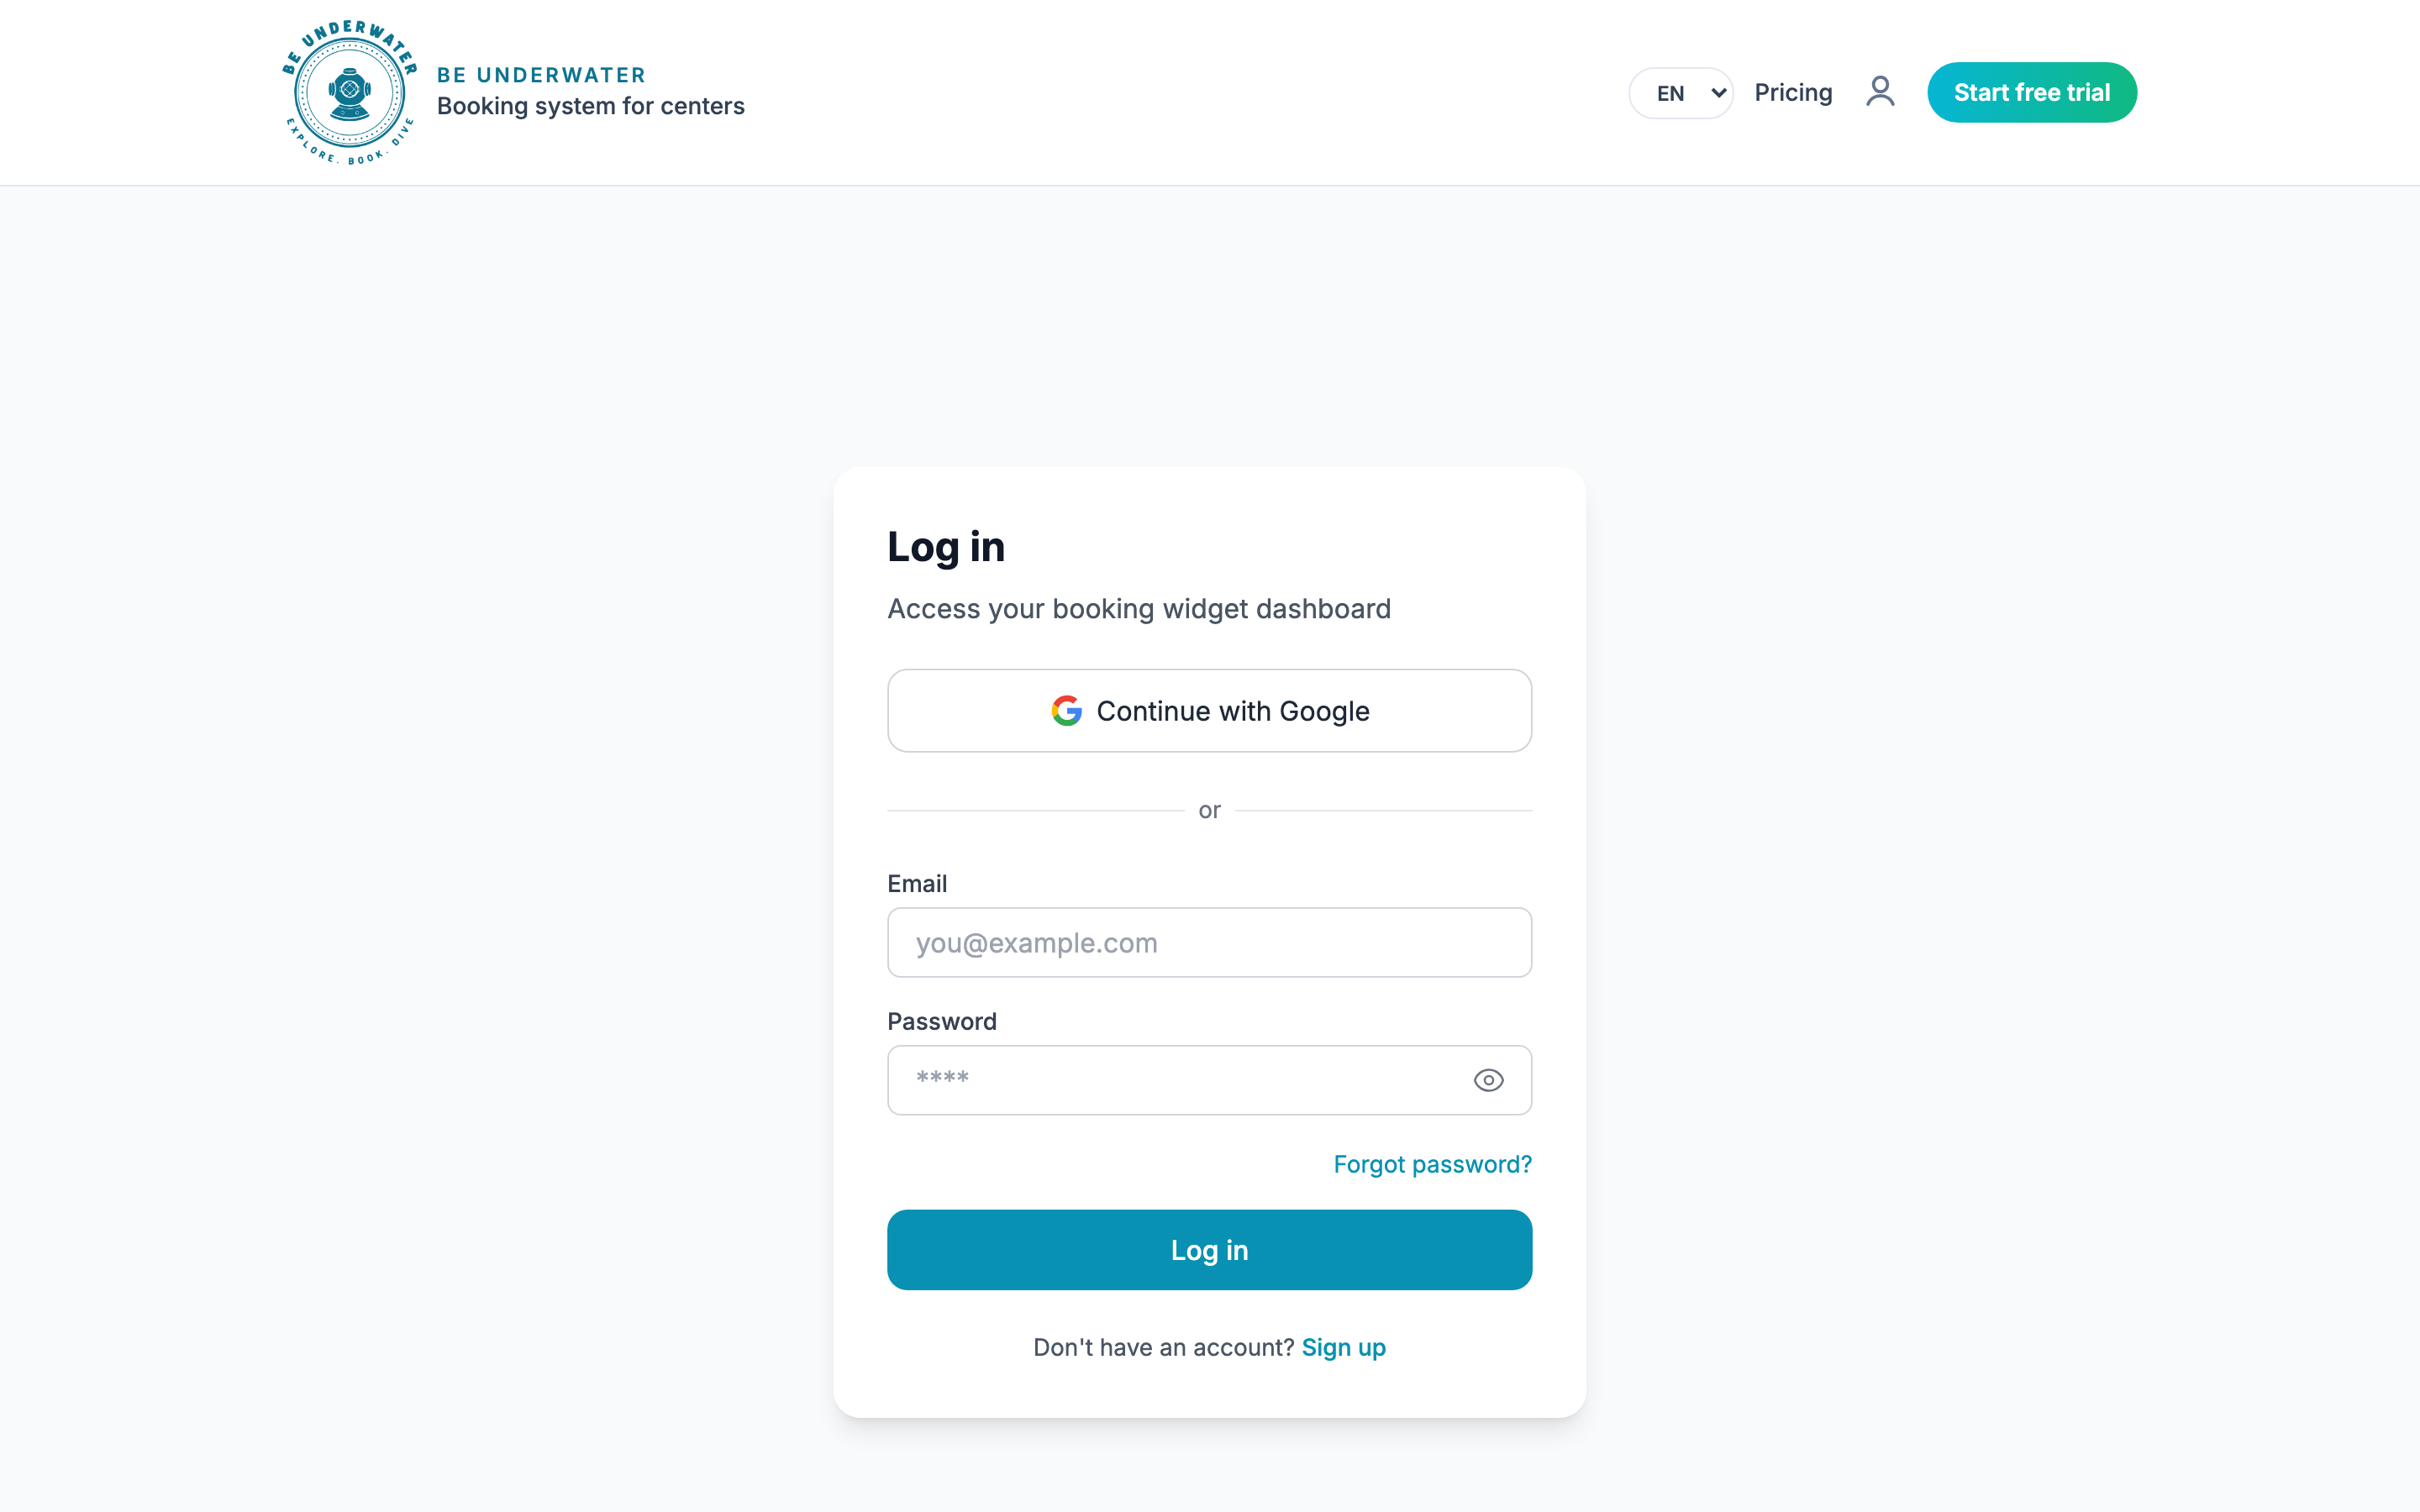
Already registered?
- Go to /login
- Enter email and password (or Continue with Google)
- Click Log in — you land on /dashboard
- Use Forgot password? if you need a reset link
Find your way around the dashboard
Home overview, sidebar navigation, and quick actions.
After login you see Hi, Espeto Diving (or your center name) and an overview of activities and bookings.
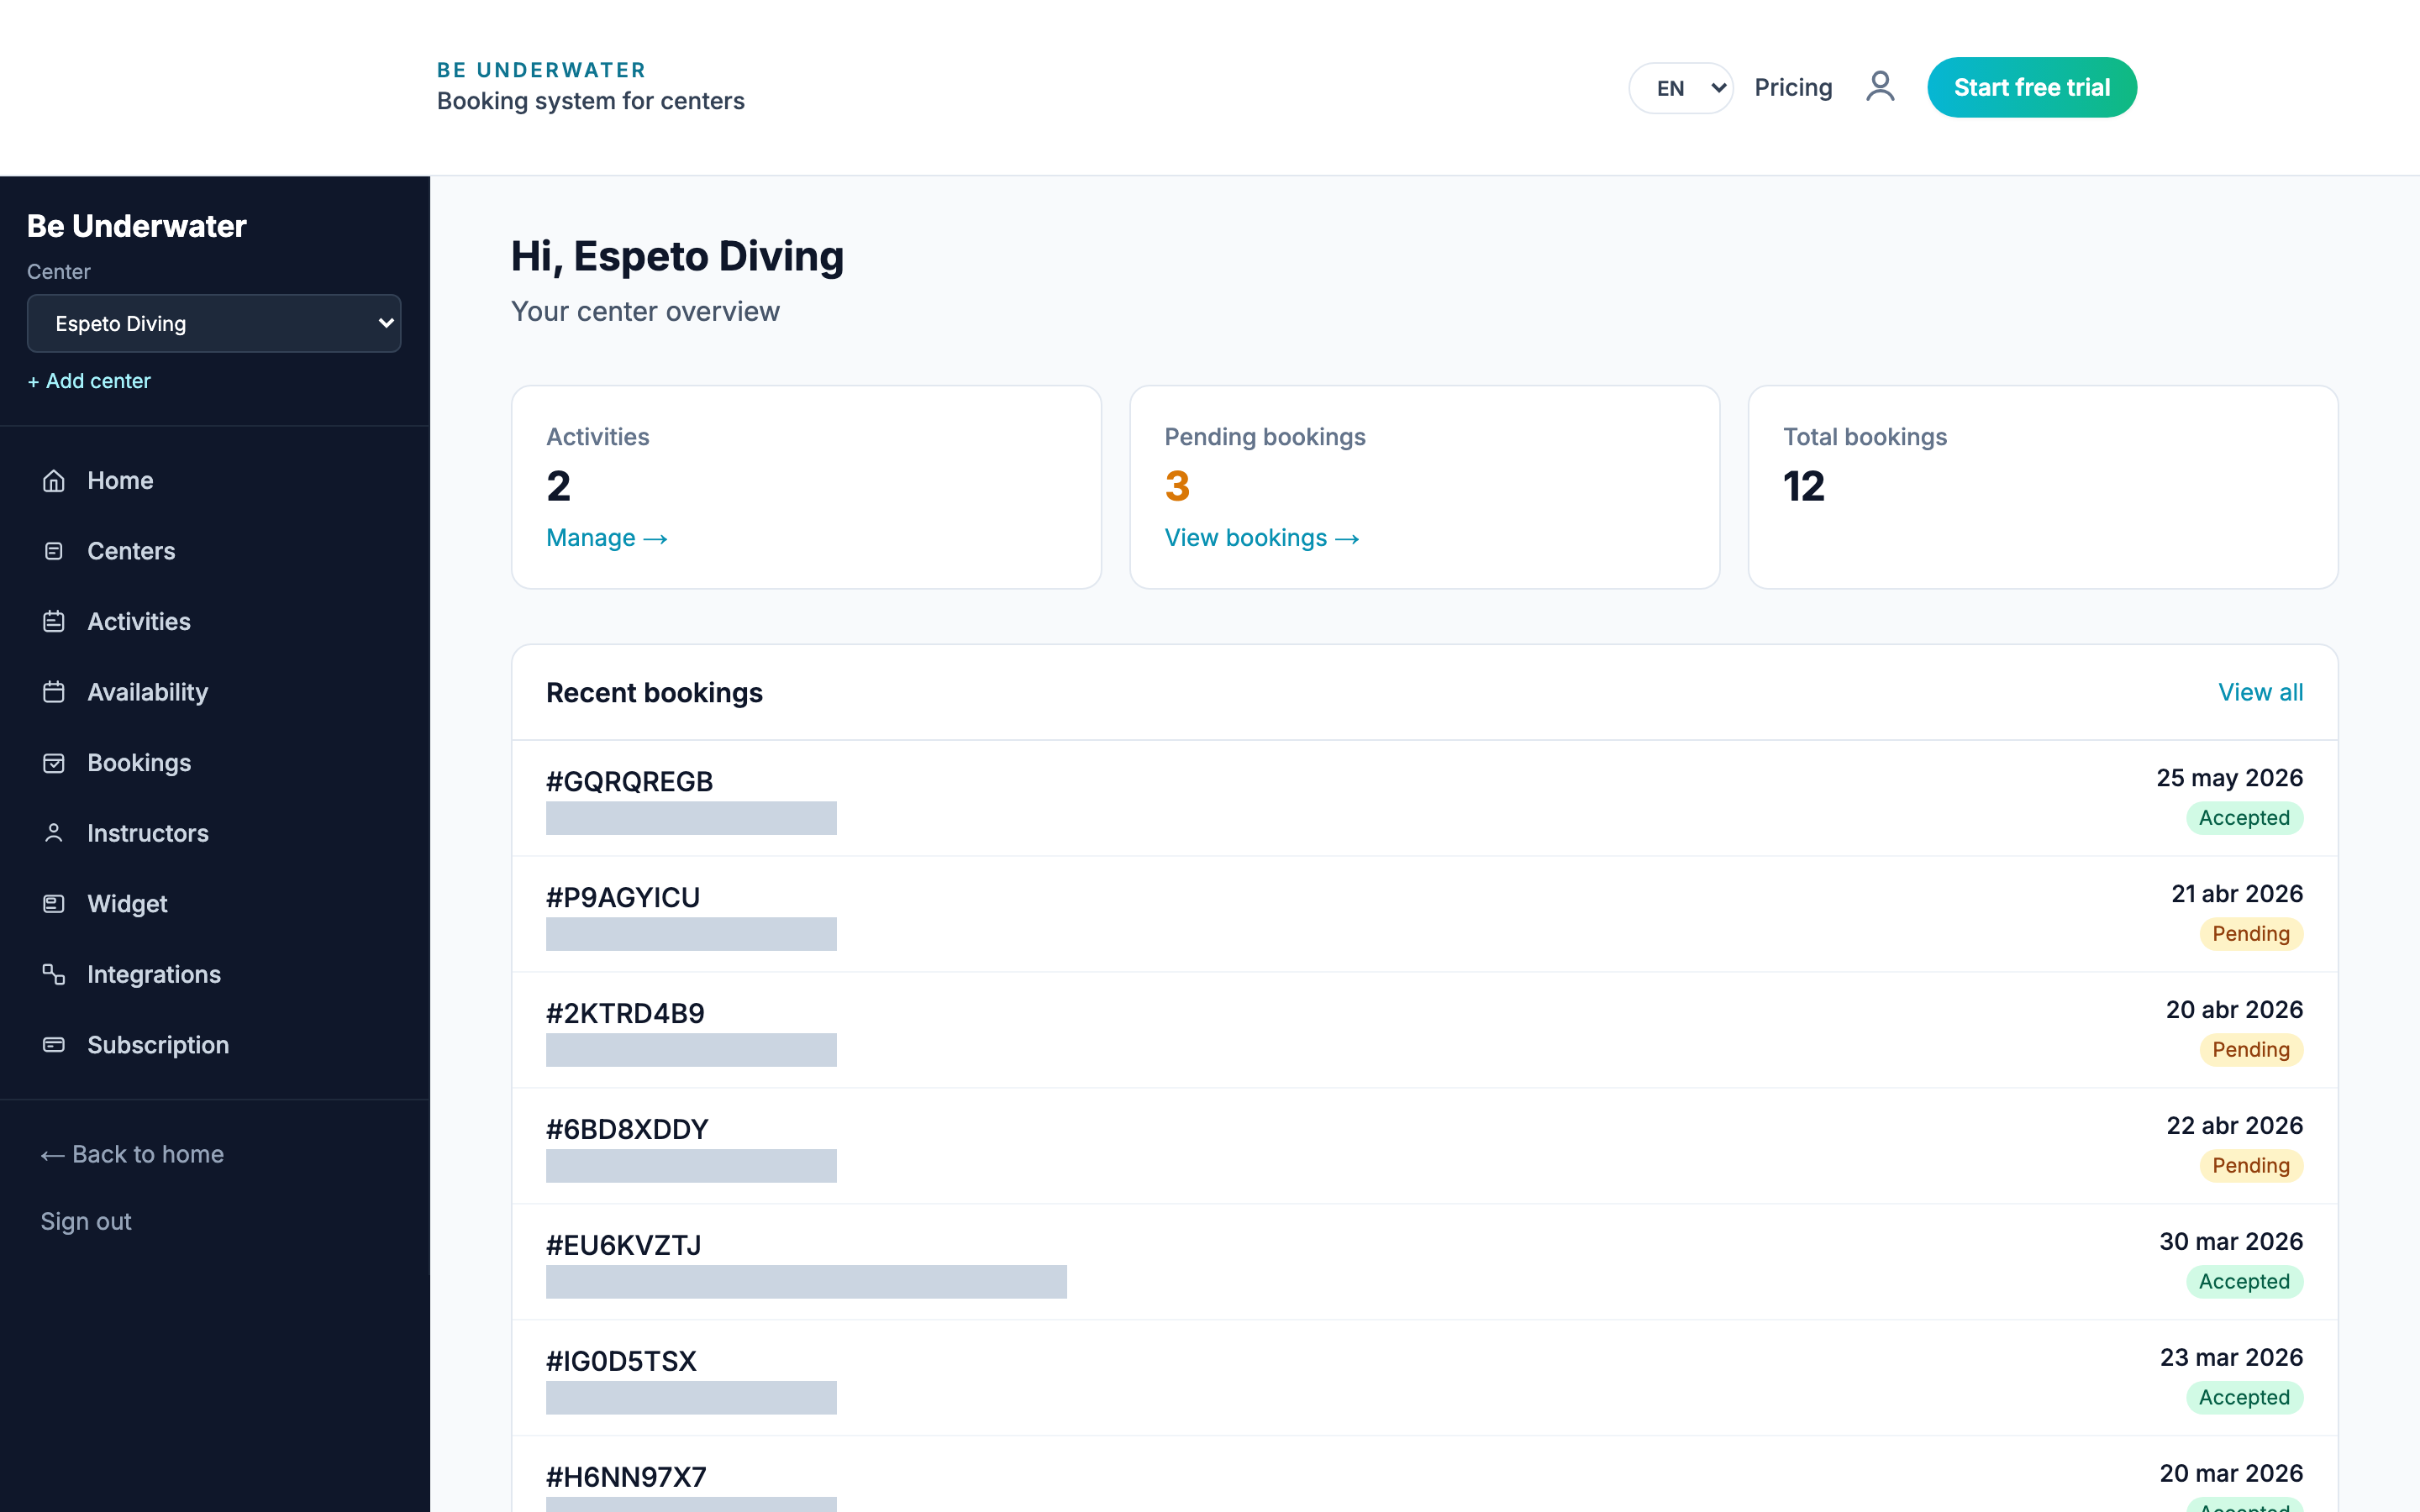
Sidebar menu
| Menu item | Path | What it does |
|---|---|---|
| Home | /dashboard | Overview cards and recent bookings |
| Centers | /dashboard/centers | Create / switch centers |
| Activities | /dashboard/activities | Courses, fun dives, lessons |
| Availability | /dashboard/availability | Dates, times, capacity |
| Bookings | /dashboard/bookings | Accept, reject, reschedule |
| Instructors | /dashboard/instructors | Assign instructors |
| Widget | /dashboard/widget | Look, embed code, domains |
| Integrations | /dashboard/integrations | External connections |
| Subscription | /dashboard/subscription | Trial, Stripe, payouts |
Quick actions on Home
- + New activity → create a bookable product for Espeto Diving
- Configure widget → customize and copy the embed code
- Stat cards link to Manage → activities or View bookings →
Set up your center profile
Centers list, timezone, and basic profile for Espeto Diving.
- Open Centers in the sidebar (/dashboard/centers)
- Confirm Espeto Diving appears under Your centers
- Use + Create center if you need a second location
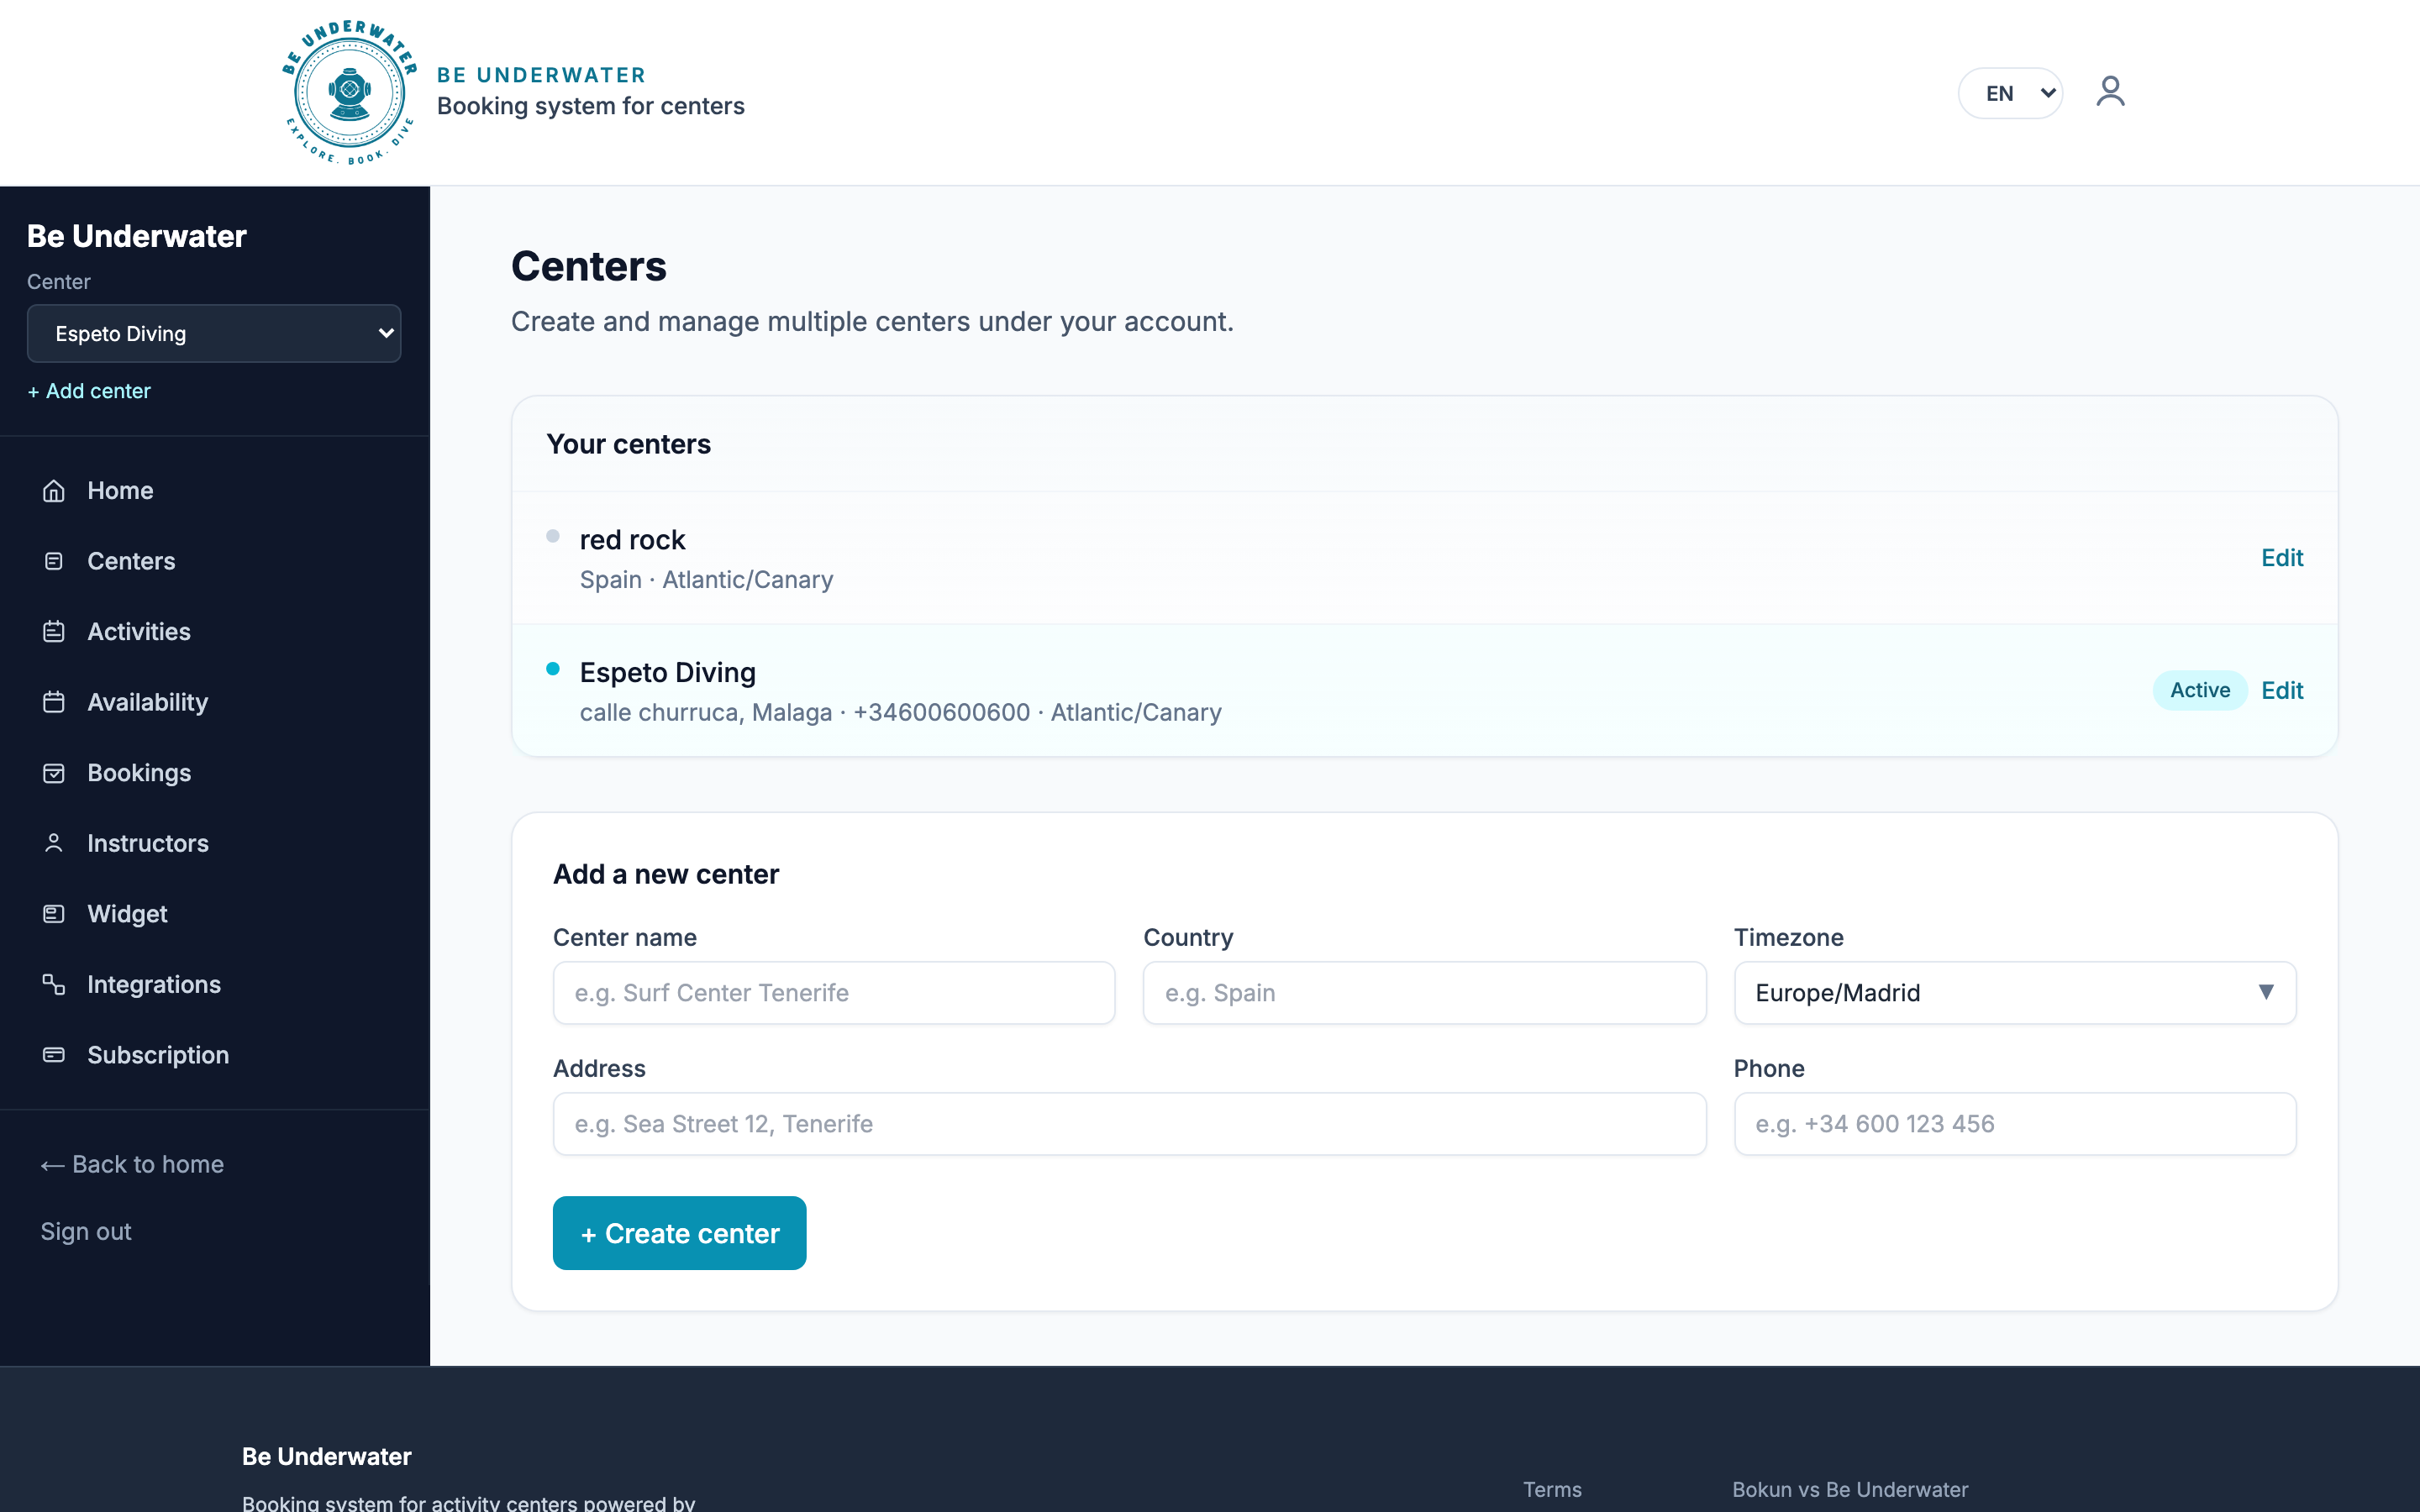
Timezone and billing-related settings live under Subscription (/dashboard/subscription). Set the correct local timezone so Espeto Diving’s availability slots and emails match real clock time.
Add activities customers can book
Create courses and experiences for Espeto Diving (Open Water, Discover Scuba, fun dives, etc.).
In Be Underwater Booking, bookable products are called Activities (not “listings”). Example for Espeto Diving: Discover Scuba Diving, Open Water, or Fun Dive × 2.
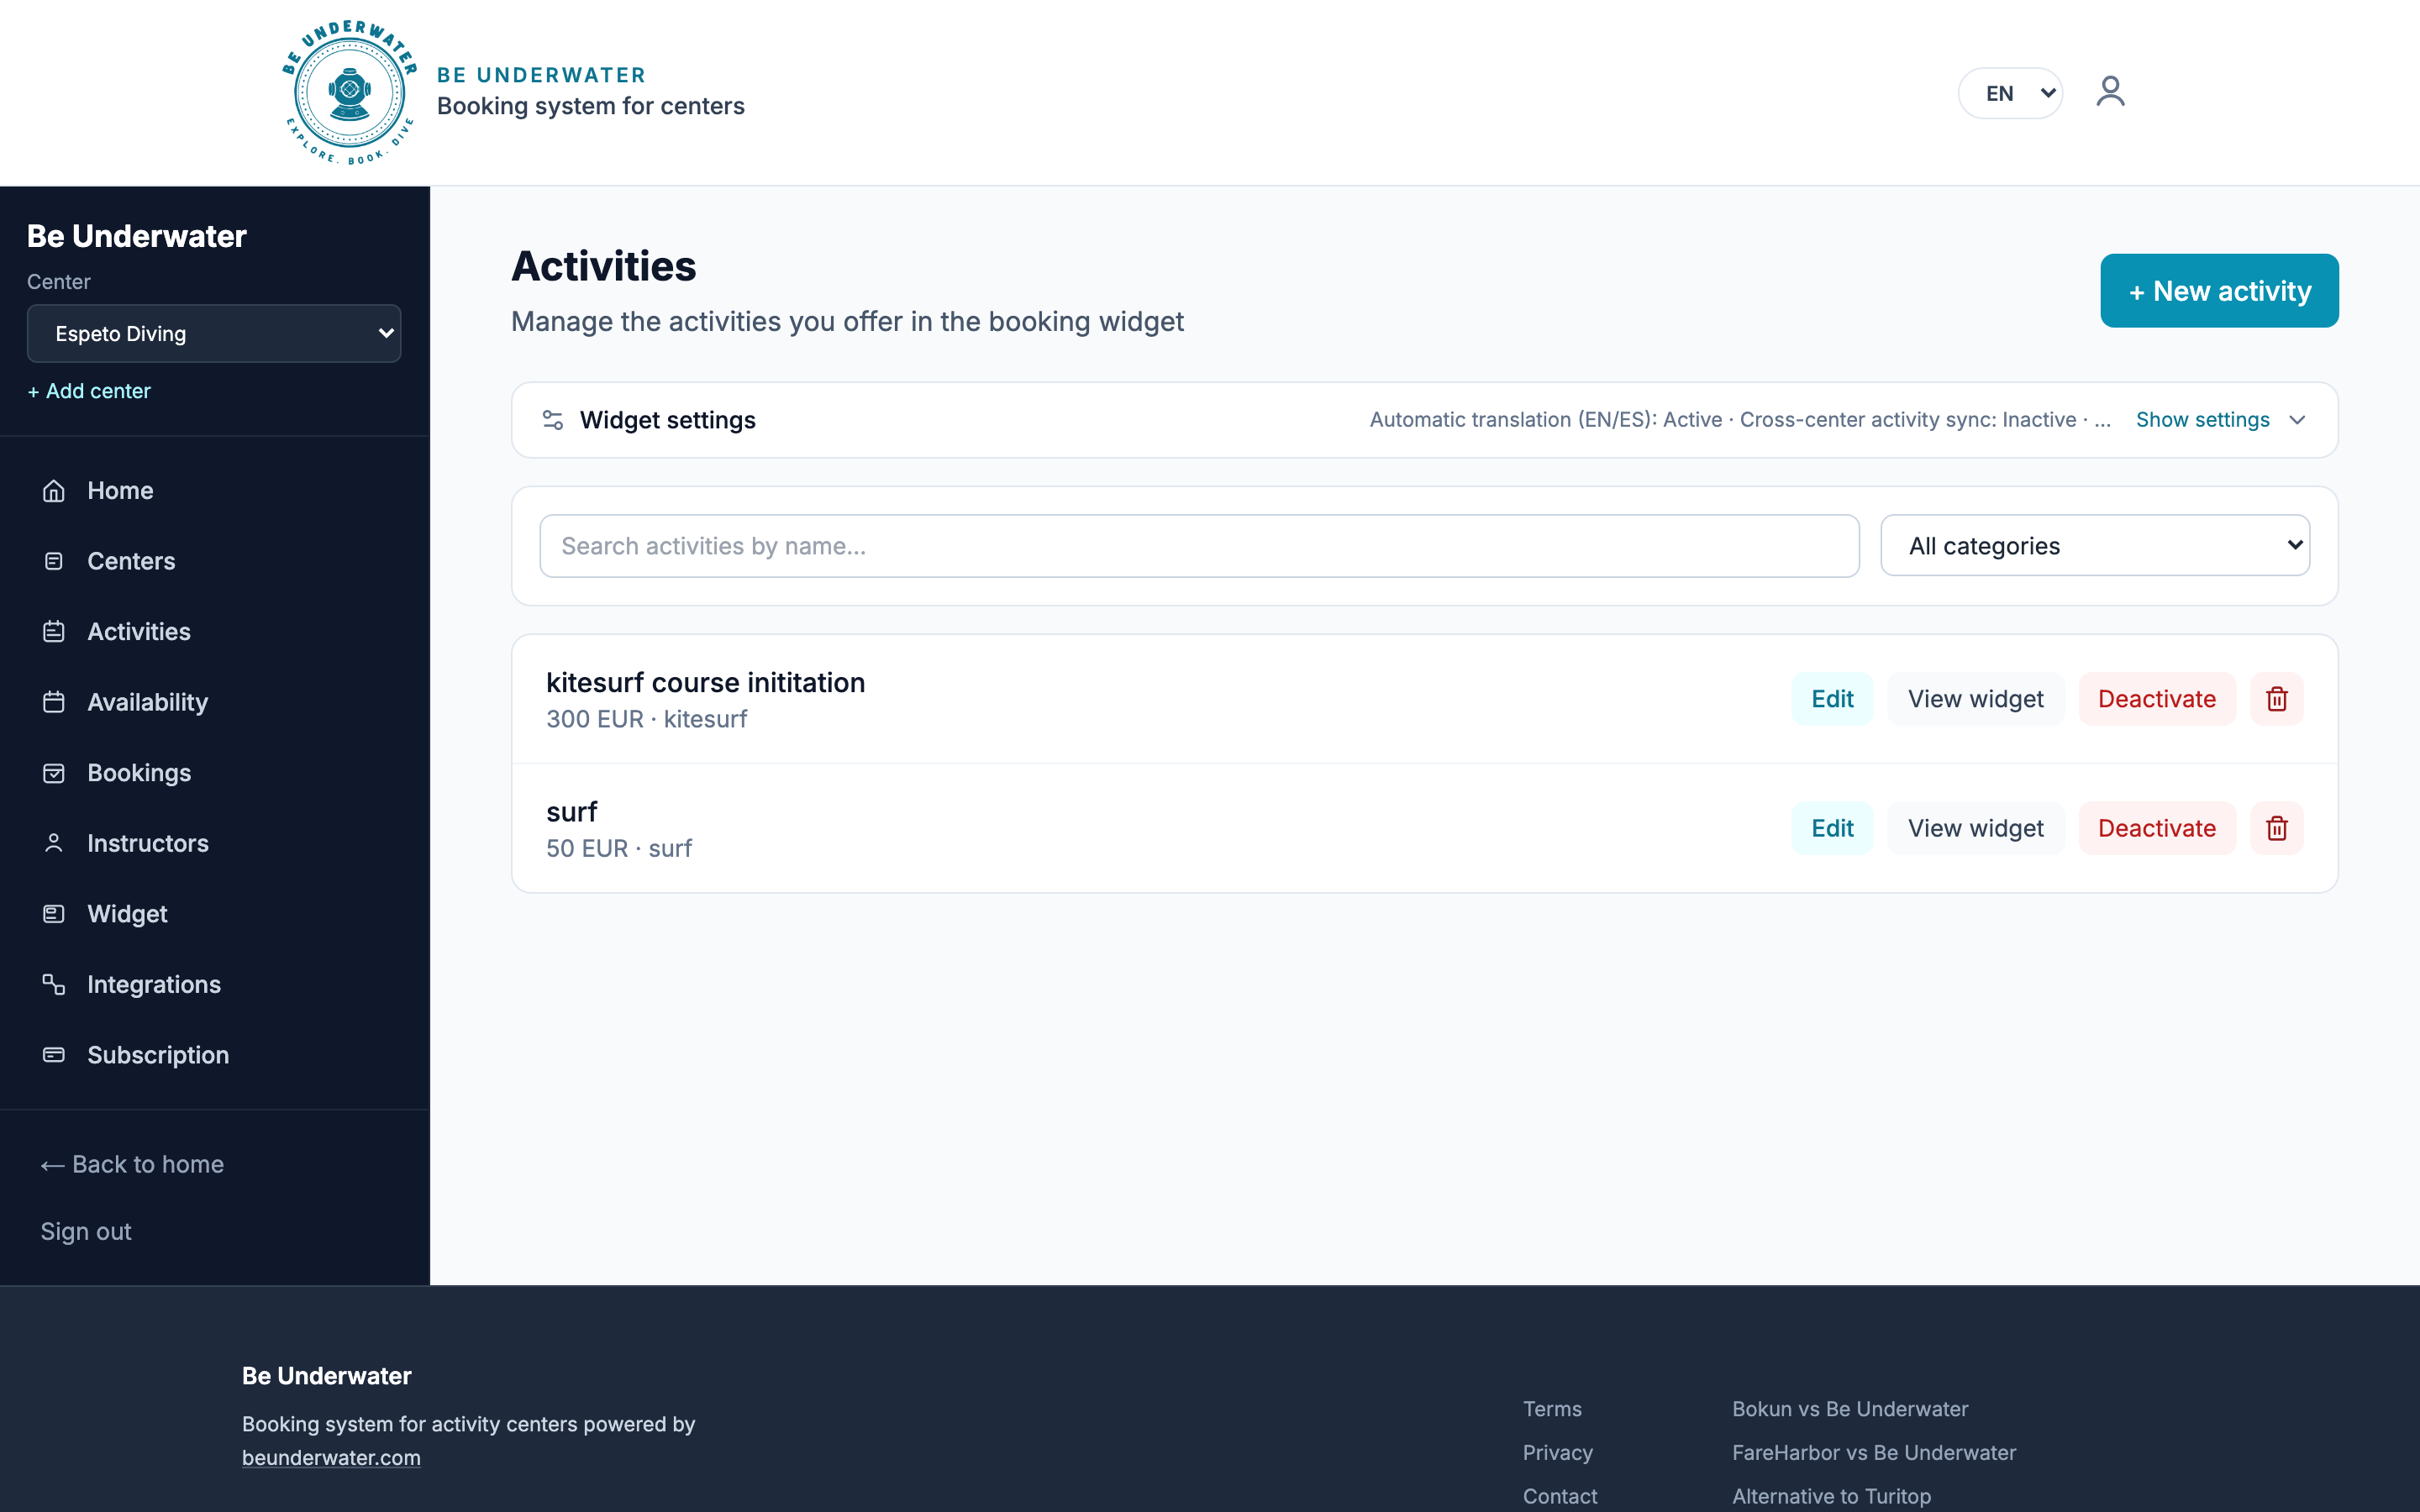
Create an activity
- Go to Activities → + New activity (or open /dashboard/activities/new)
- Fill Basic info: Activity name, Description, Category (Diving, Surf, Kitesurf, Other…)
- Set Duration and unit (Hours / Days)
- Optional: enable Customer chooses time
- Fill Price & capacity: Price, Currency, Max participants, optional Extra participant price
- Choose widget pricing: Per participant or Fixed group
- Optional: turn on Automatic confirmation (skips manual approve) or Non-refundable
- Optional: add Extra questions (widget) — one question per line
- Optional on create: check Create availability for this activity and set date range + weekdays + start time
- Click Create activity
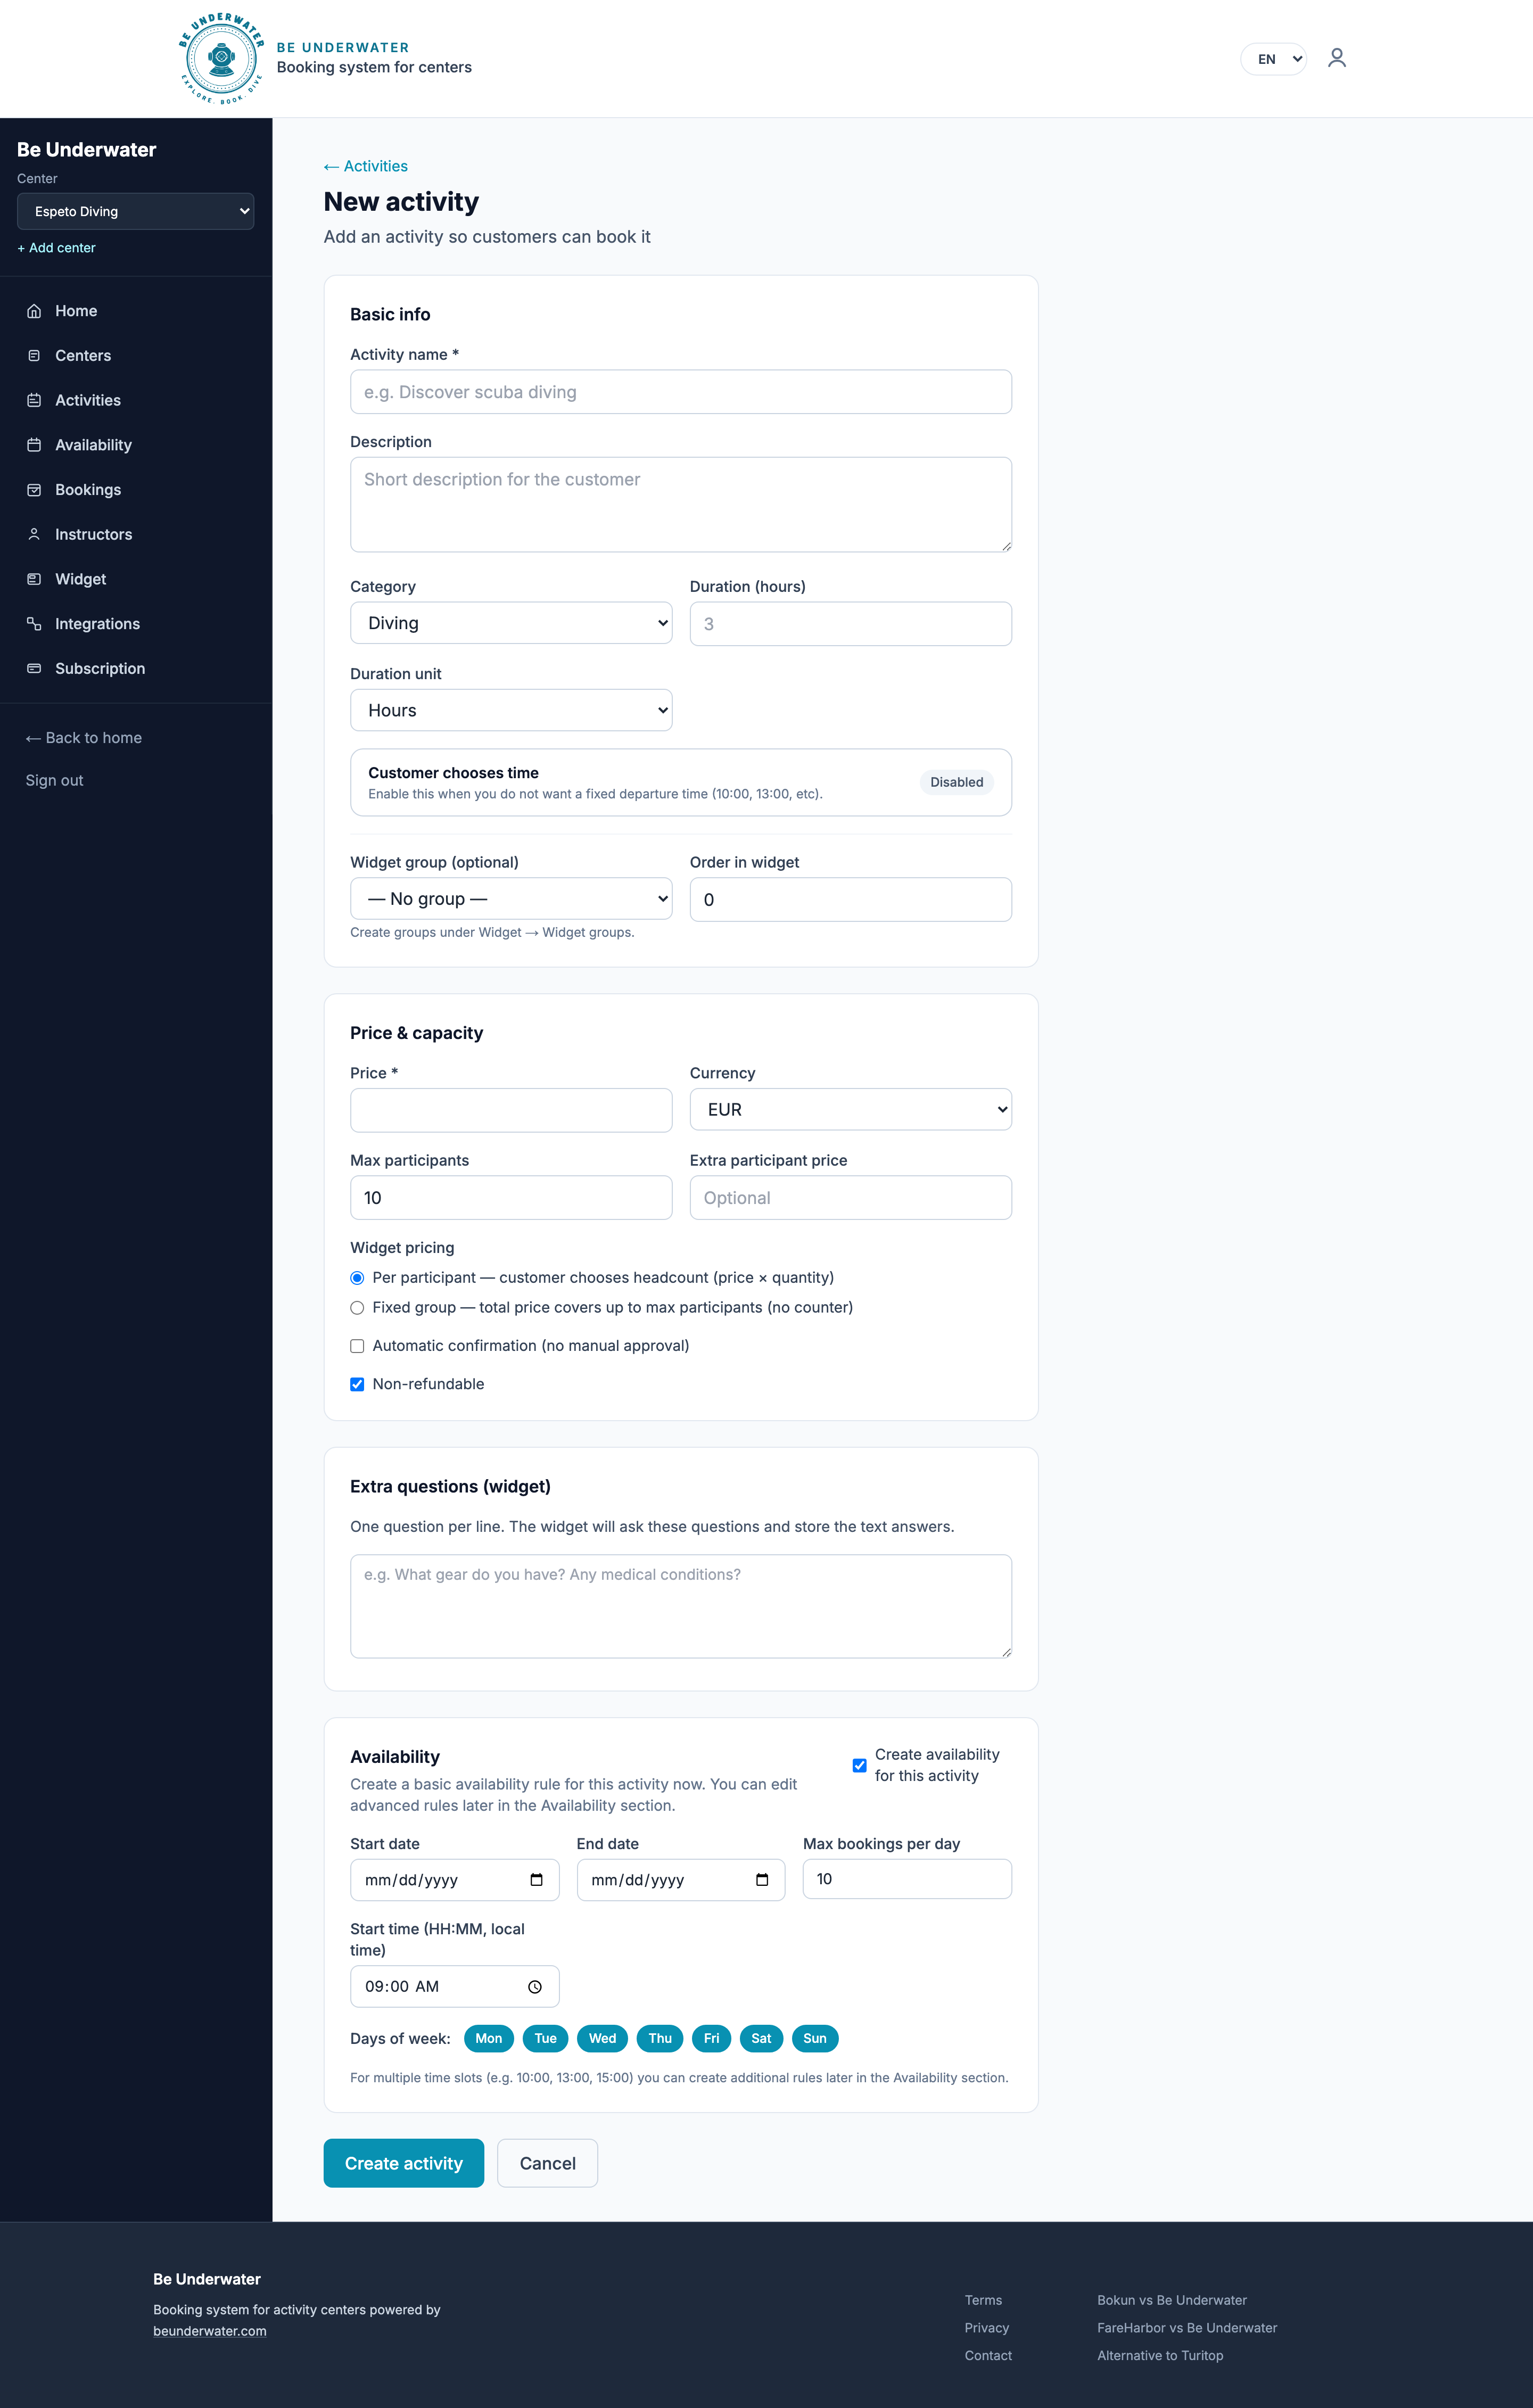
Manage existing activities
- Edit — change price, description, capacity
- View widget — open the public booking page for that activity
- Deactivate / Reactivate — hide from the widget without deleting
- Delete — remove permanently
On the activities list you can also tweak widget options per listing: auto-translate, cross-center sync, booking lead time, and default pricing mode.
Set dates, times, and capacity
Availability rules and calendar blocks so Espeto Diving shows bookable slots.
Without at least one active availability rule, the Espeto Diving widget will show no bookable dates.
Availability rules
- Open Availability (/dashboard/availability)
- Select the Activity (e.g. Discover Scuba)
- Set Start date and End date
- Toggle Days of week (Mon–Sun)
- Set Start time (and optional End time)
- Set Max participants per slot
- Optional: add Departure time slots with Add slot
- Click Add availability
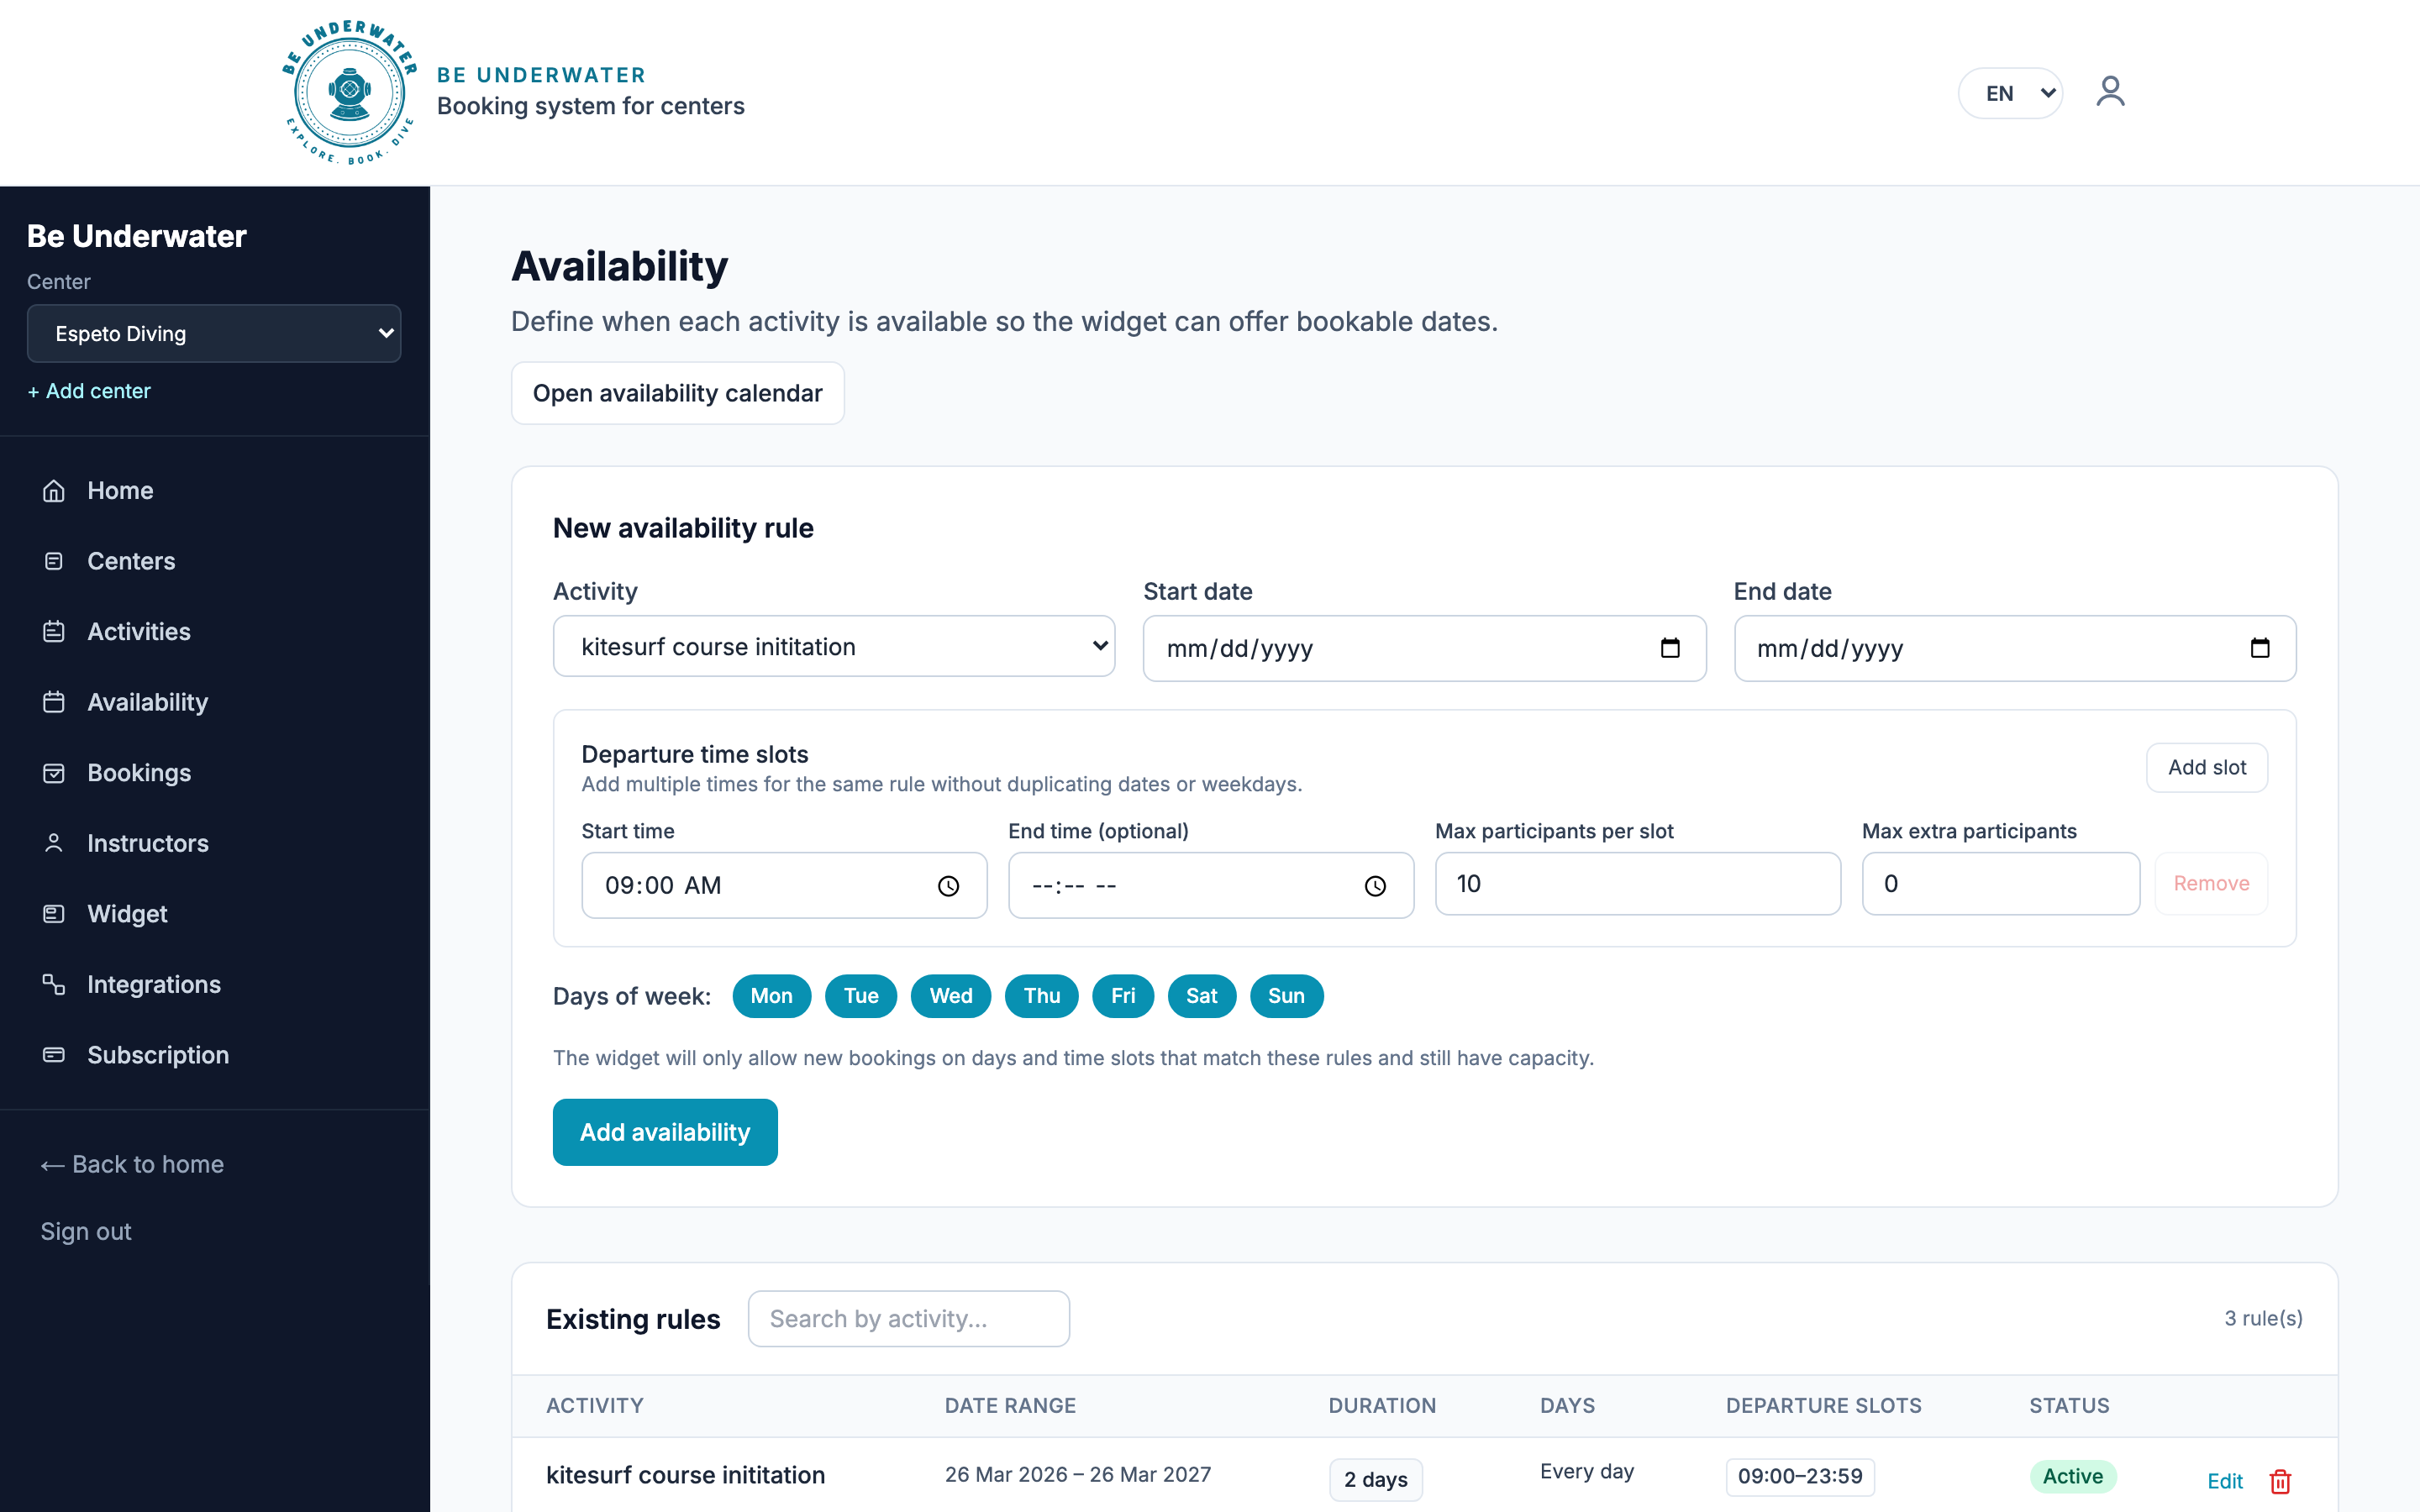
Existing rules appear in the table — use Edit or Delete as needed. You can also manage availability from the Edit activity page.
Availability calendar
- Click Open availability calendar (or go to /dashboard/availability-calendar)
- Block hours or whole days when Espeto Diving cannot run trips (weather, private charters, holidays)
- Use ← Back to availability to return to rules
Start your trial, connect Stripe, get paid
Subscription, Stripe Connect payouts, and how card authorization works.
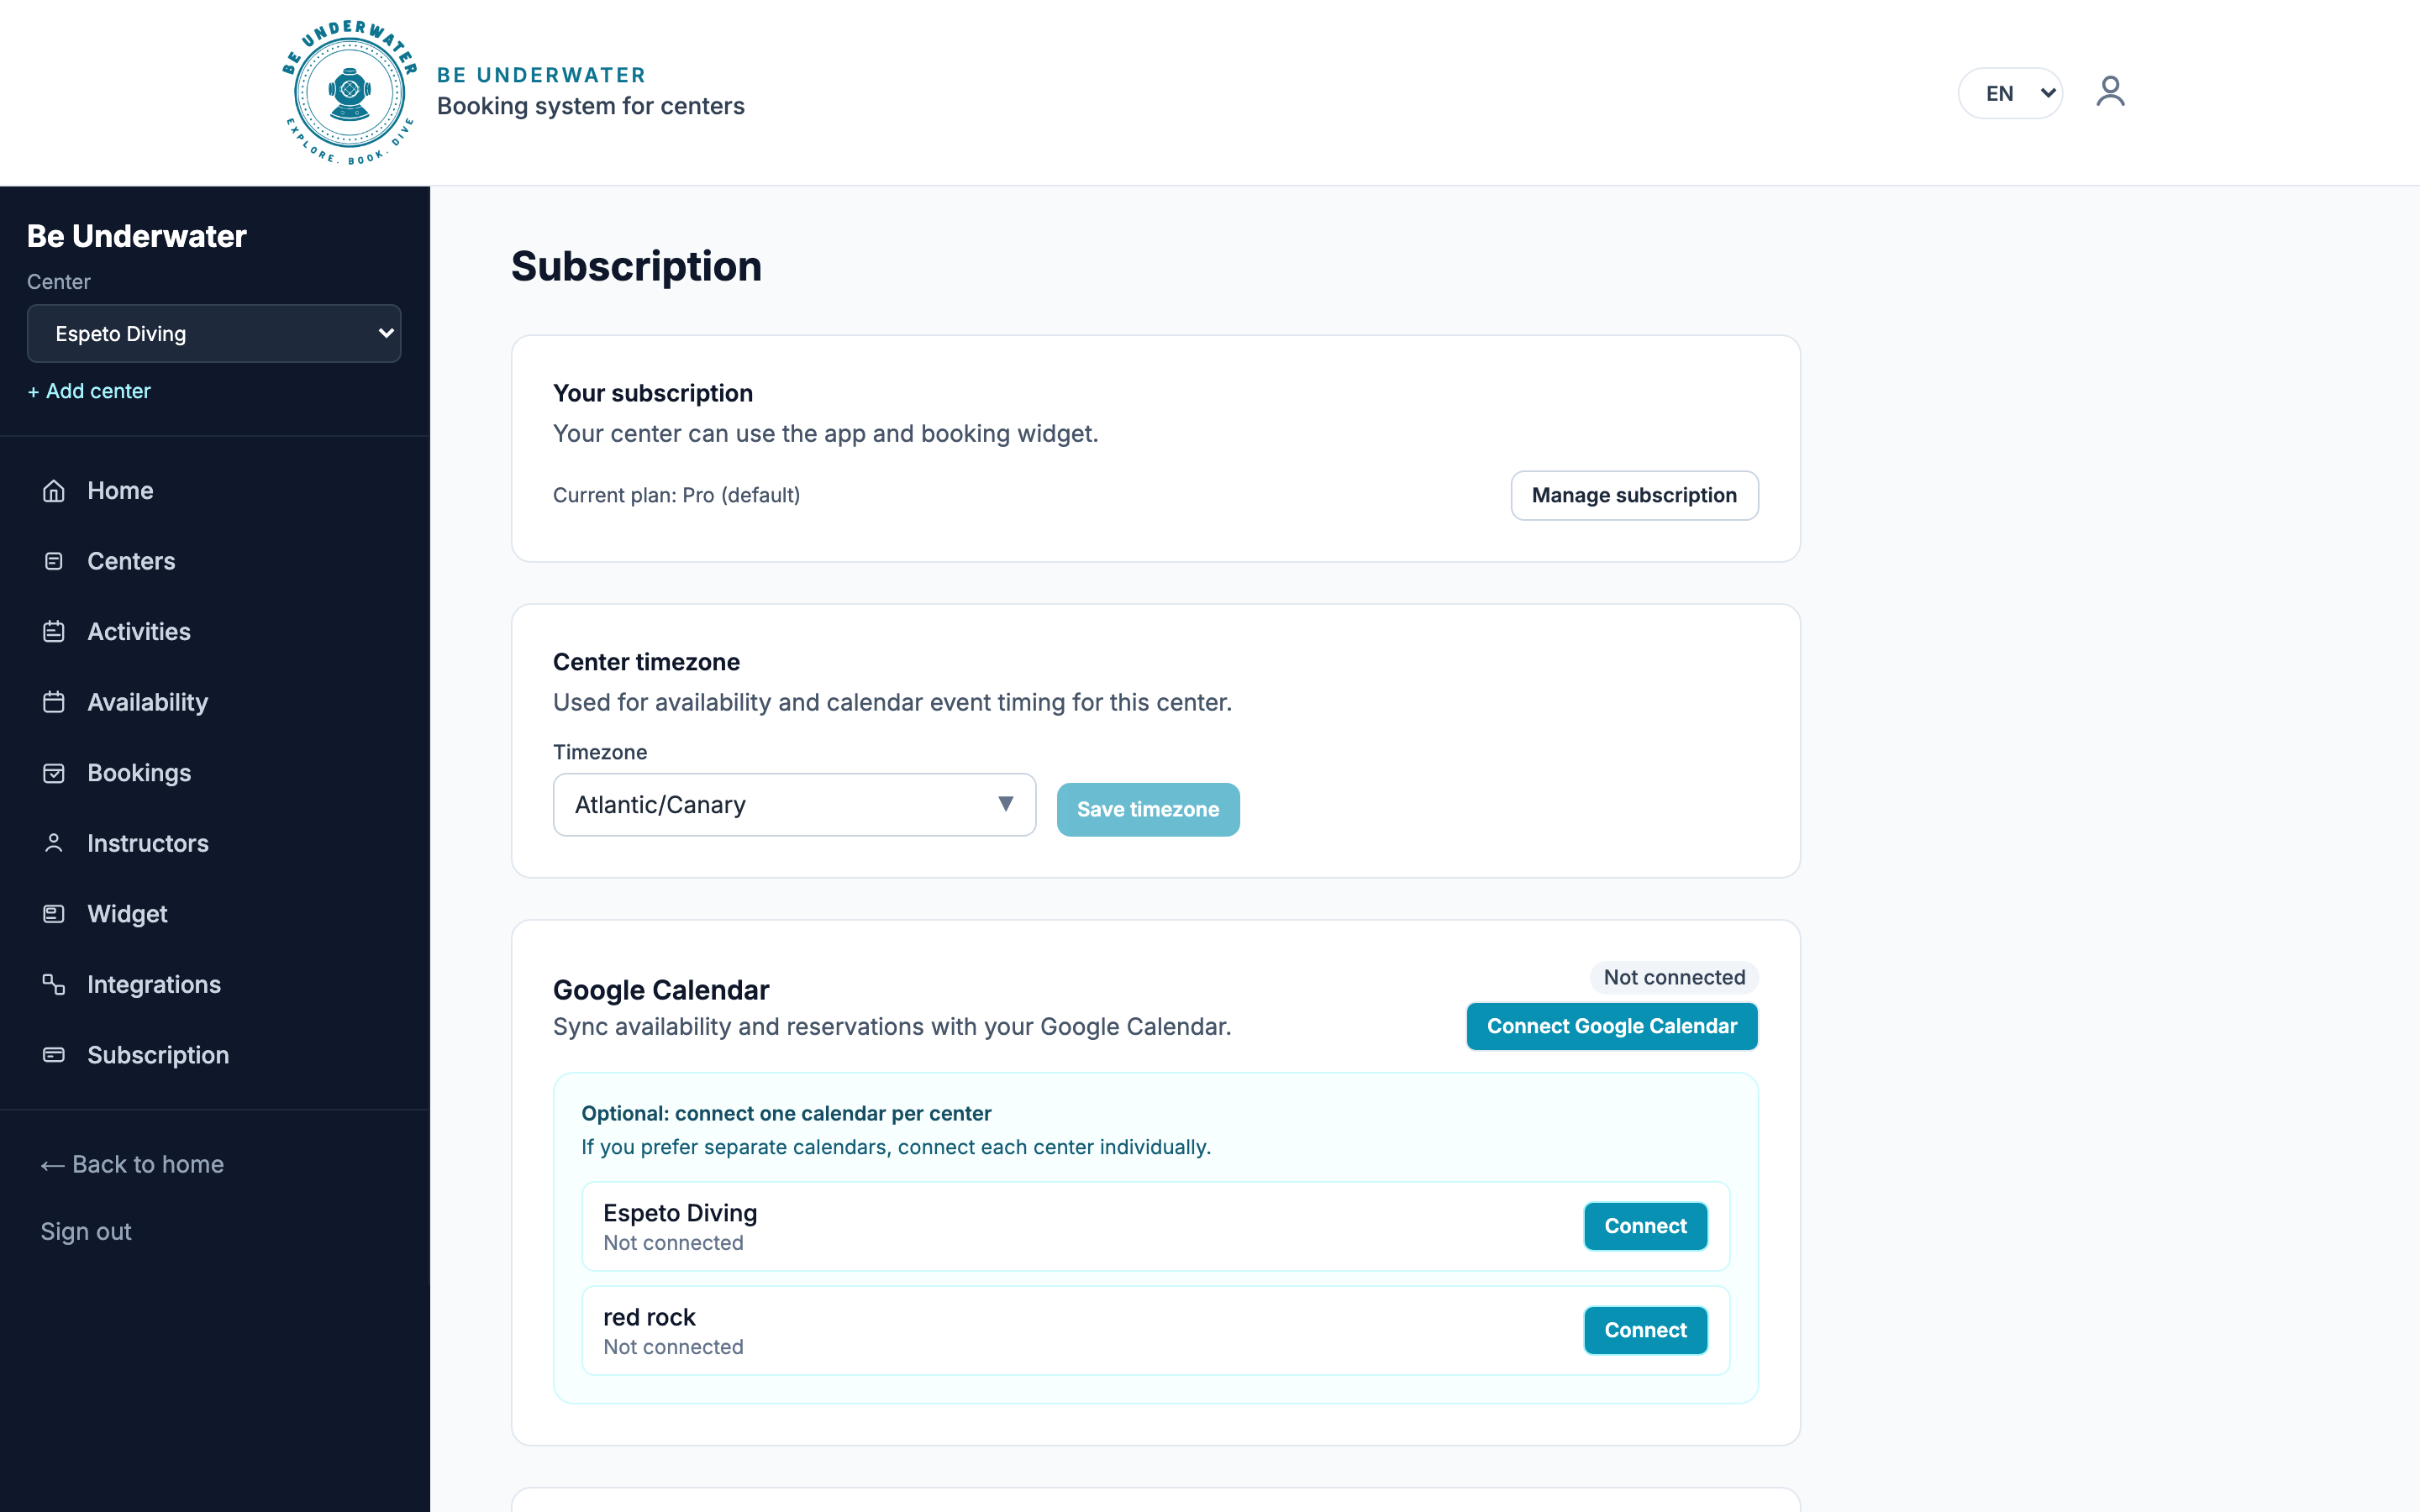
- Open Subscription (/dashboard/subscription)
- Click Start your 7-day free trial (no charge today)
- Under Payout account (Stripe), click Connect with Stripe (or Continue Stripe onboarding)
- Complete Stripe’s form so Espeto Diving can receive payouts
- When ready, the badge shows Stripe account ready — you can open the Stripe Dashboard anytime
Pricing model
- €20/month (Europe) or $20/month (elsewhere) + 1% per booking
- Manage billing later with Manage subscription (Stripe customer portal)
How payments work
- Customer books on the Espeto Diving widget → card is authorized (not charged yet)
- Center gets an email and sees the booking as Pending
- Click Accept / Accept and charge → payment is captured
- Reject → authorization is released, customer is not charged
- Reschedule → propose new dates instead of accepting immediately
Customize and embed the booking widget
Appearance, allowed domains, and copy-paste embed code for the Espeto Diving website.
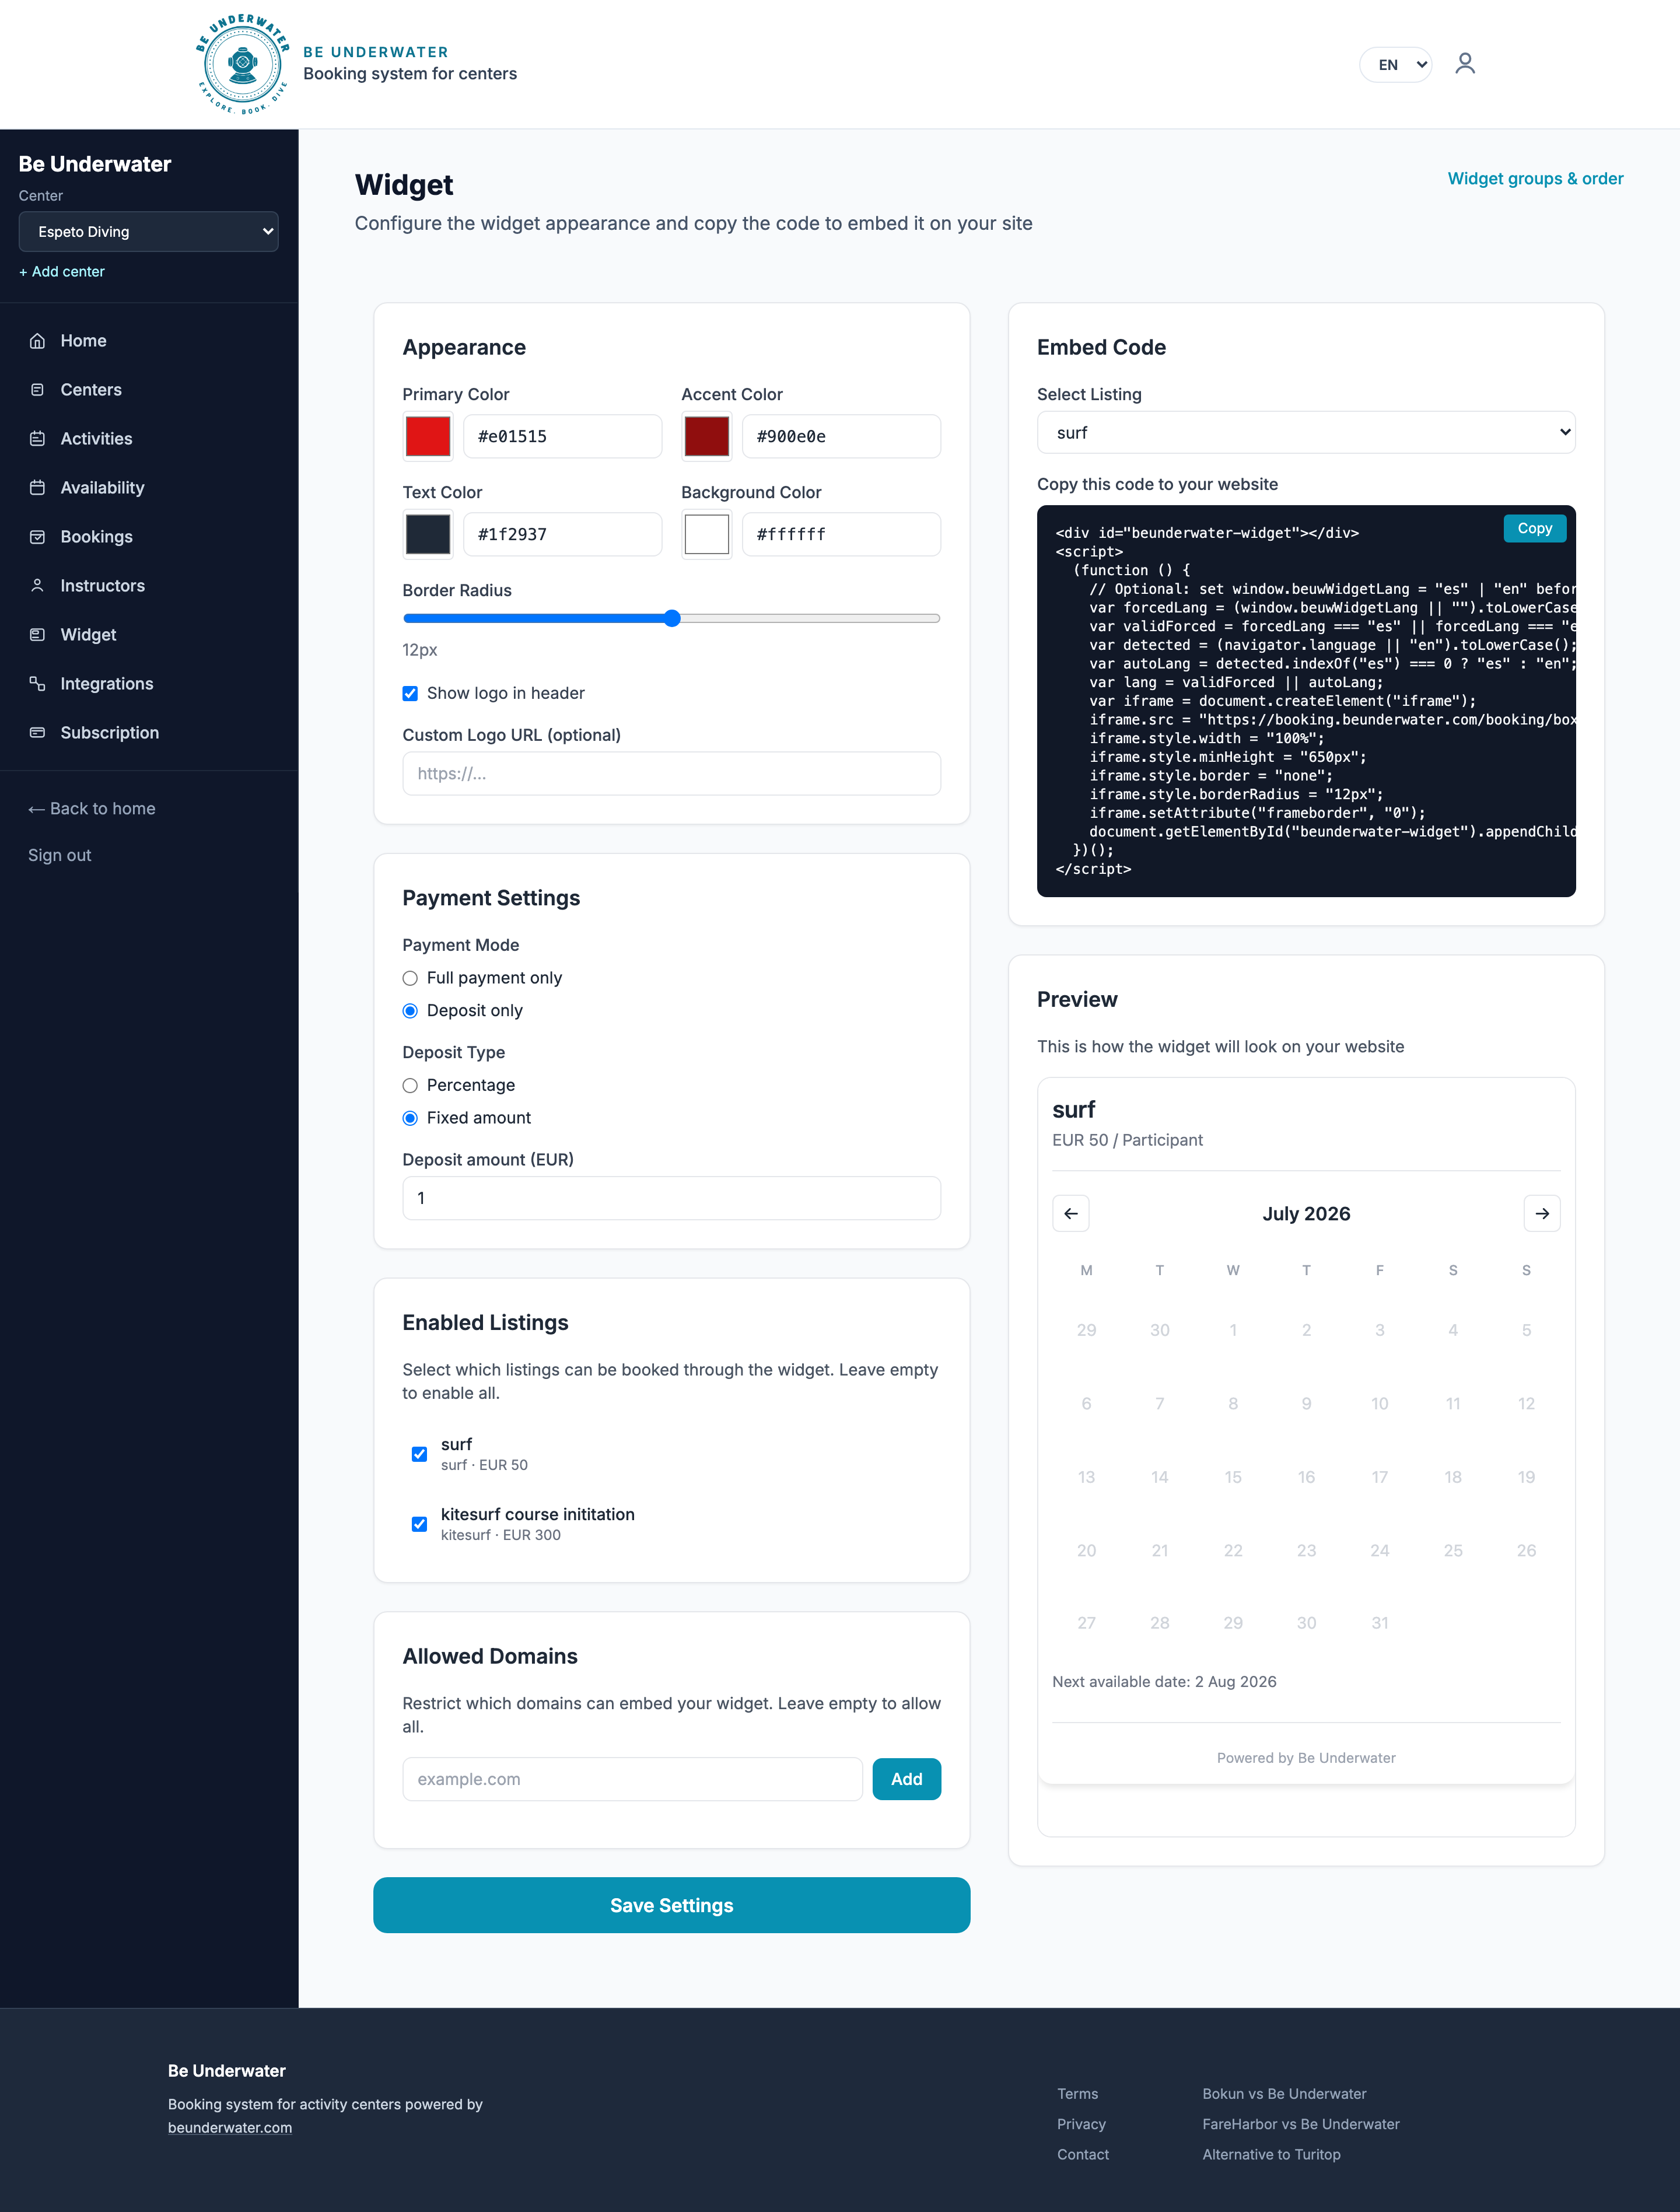
- Open Widget (/dashboard/widget)
- Set Appearance: primary/accent/text/background colors, border radius, logo
- Configure Payment Settings: Full payment only or Deposit only (percentage or fixed)
- Optionally limit Enabled Listings (empty = all Espeto Diving activities)
- Add Allowed Domains (e.g. espetodiving.com) and click Add
- Click Save Settings
Copy the embed code
- In Embed Code, choose Select Listing: All activities (multi widget) or a single activity (e.g. Open Water)
- Click Copy
- Paste the snippet into your website (HTML block on WordPress, Webflow, custom site, etc.)
- Use Preview to check the live widget
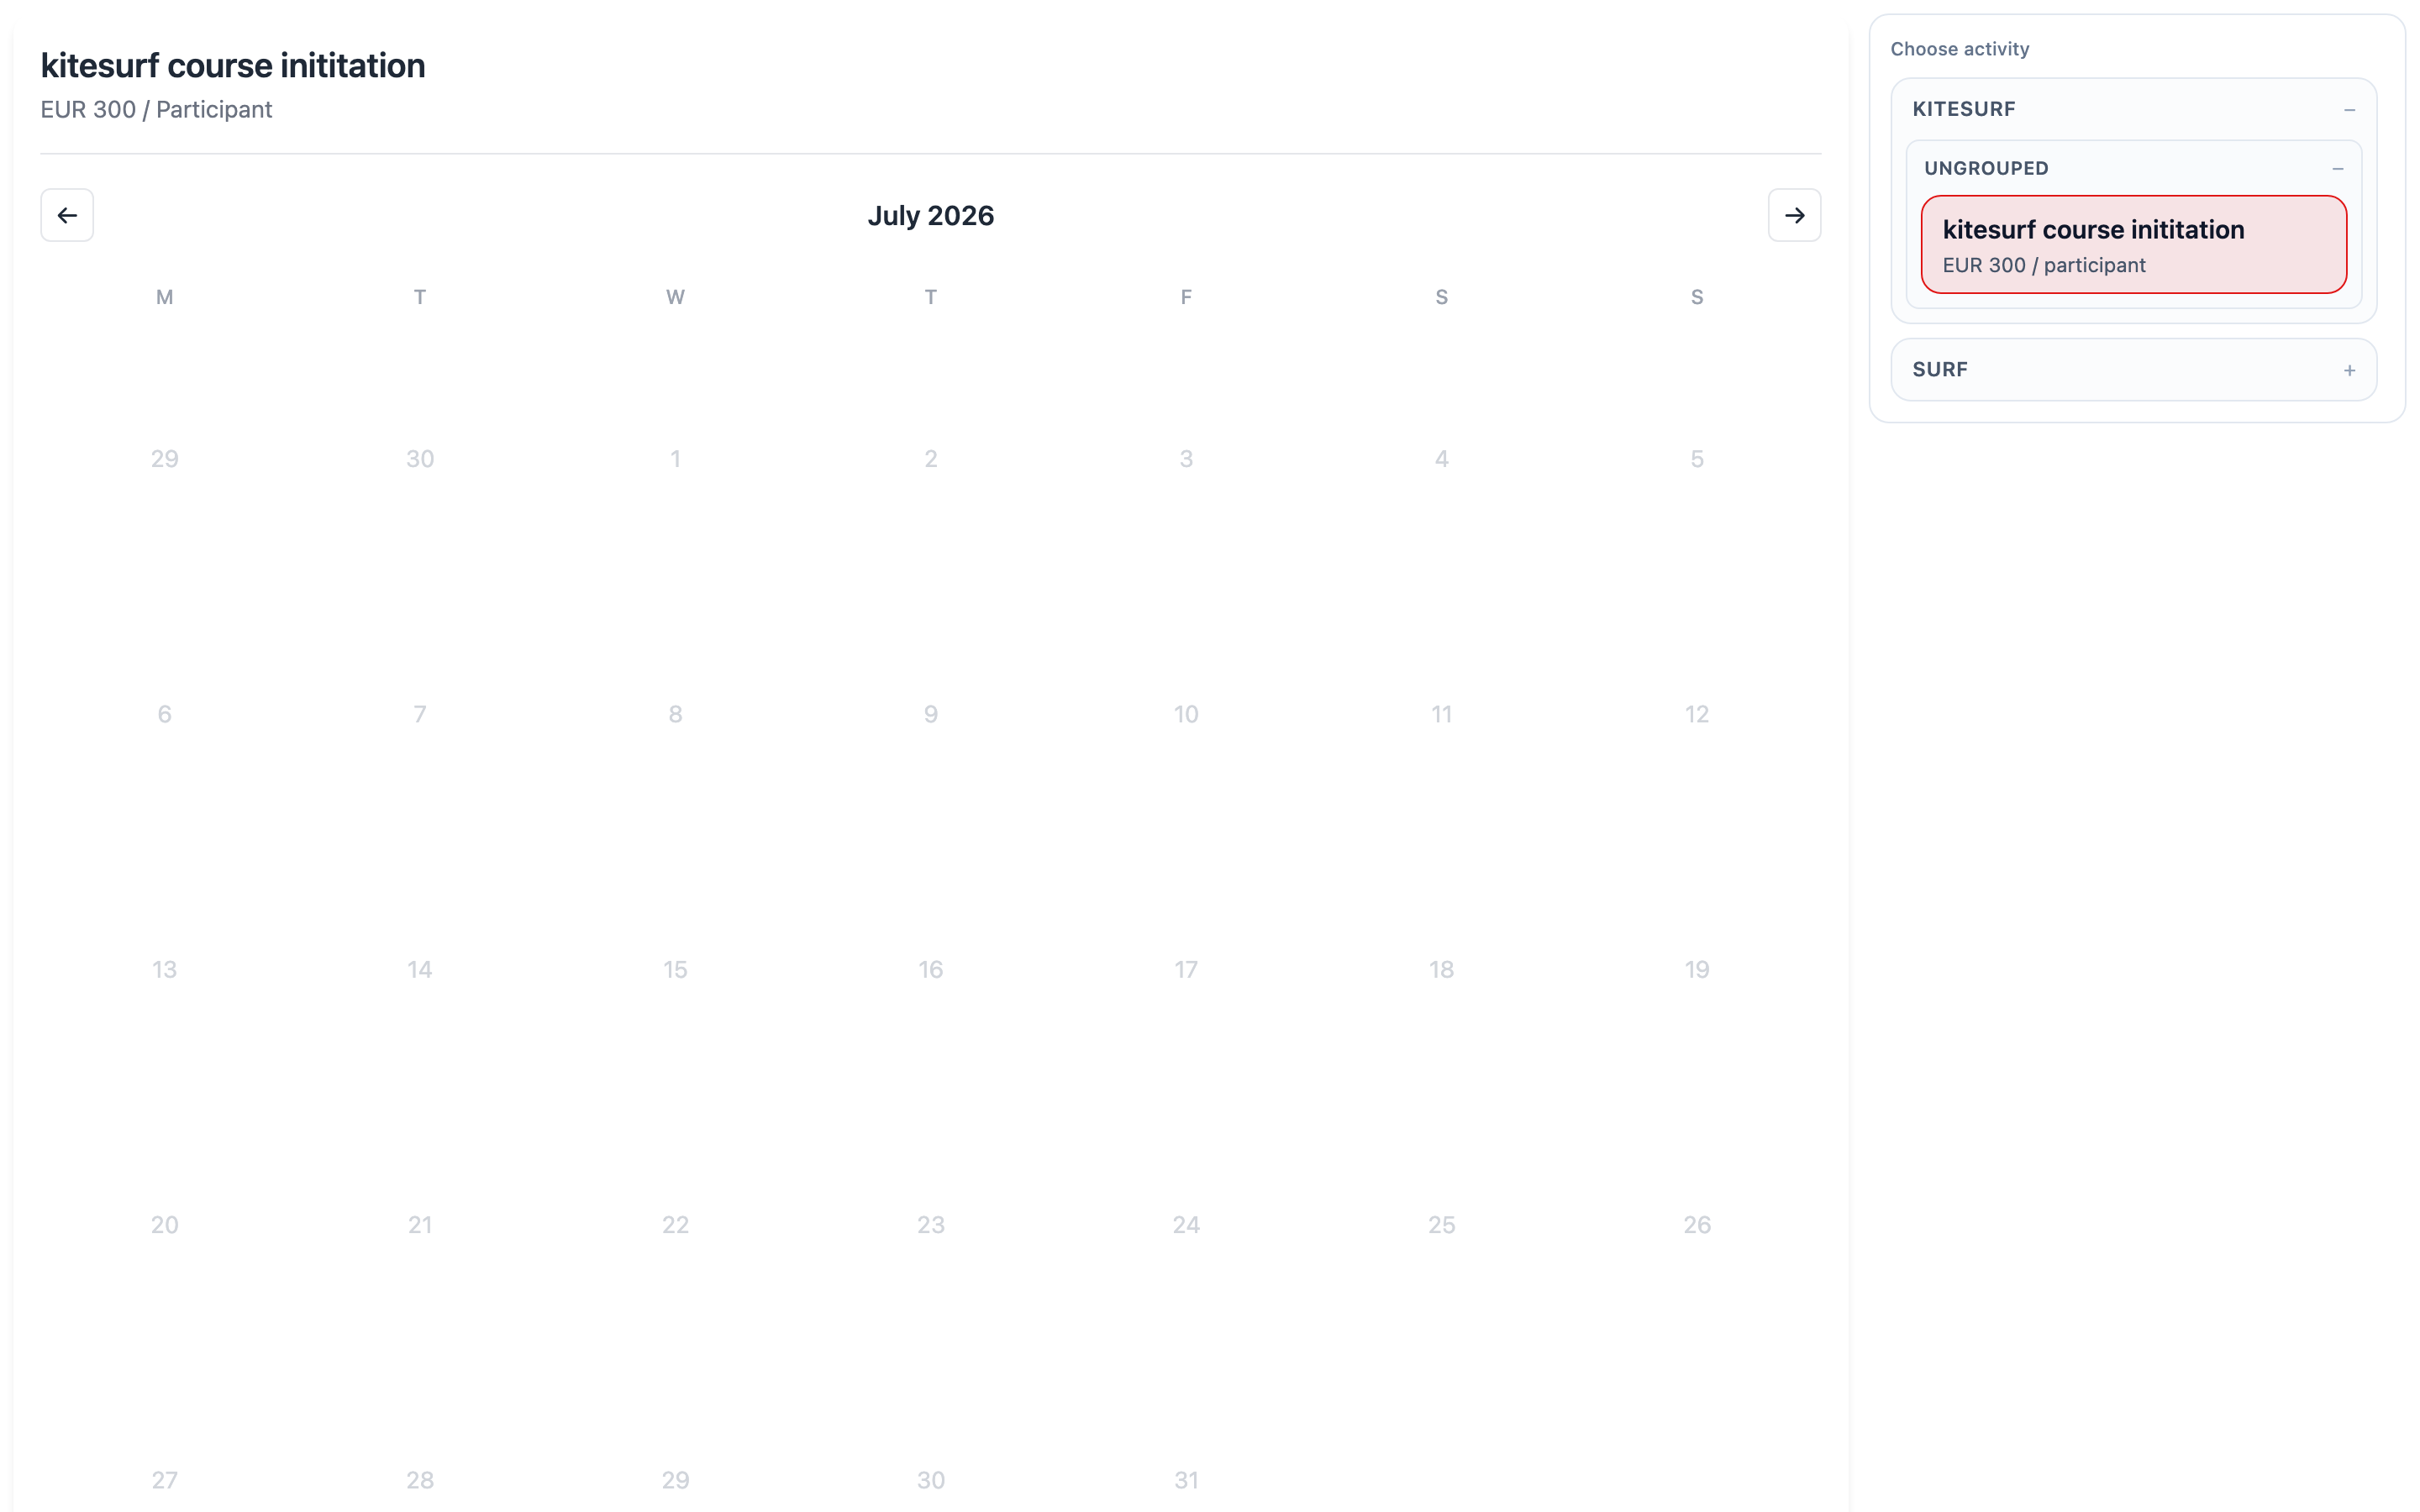
Widget URL patterns
| Type | Path pattern |
|---|---|
| Single activity | /booking/box/{centerId}/{listingId}/{lang} |
| All activities | /booking/box/{centerId}/multi/{lang} |
| Language | en, es, de, or fr in the URL |
Legacy path /widget-settings redirects to /dashboard/widget.
Accept, reject, and reschedule bookings
Day-to-day operations for Espeto Diving reservations.
From the dashboard
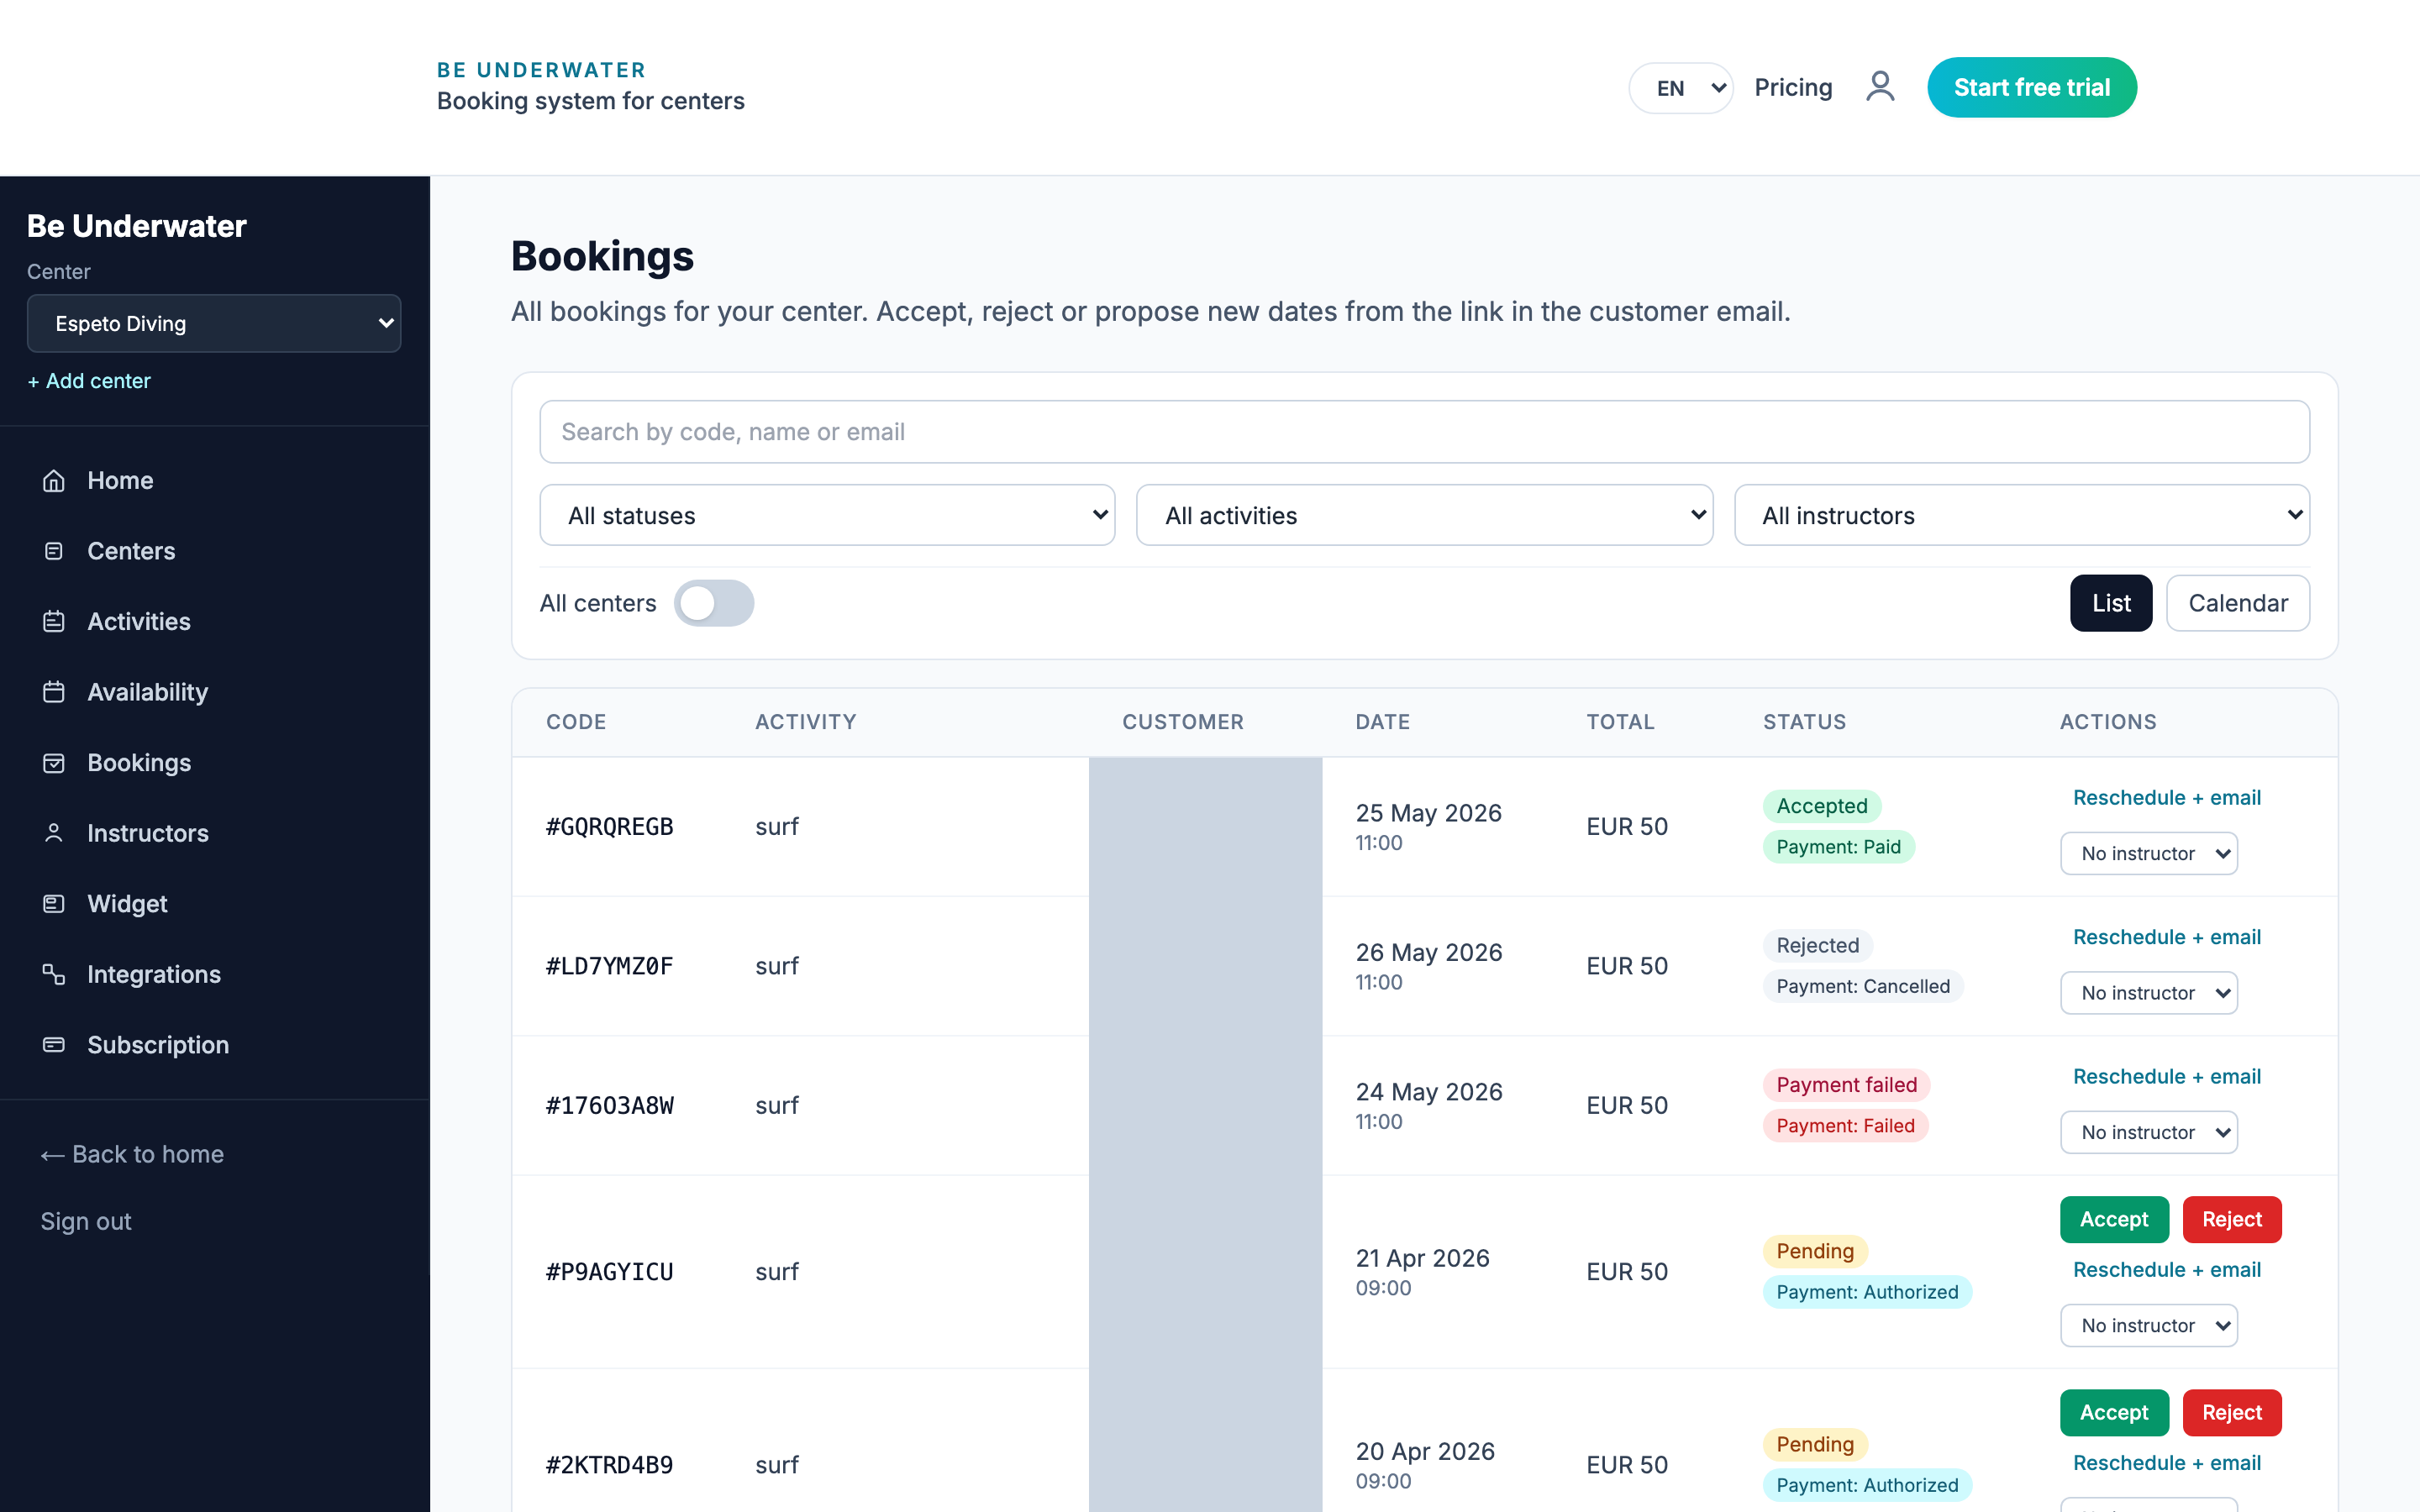
- Open Bookings (/dashboard/bookings)
- Filter Pending to see new Espeto Diving requests
- On a row: Accept, Reject, or Reschedule + email
- For reschedule: fill date/time/message in Propose reschedule → Send email
- Open a booking for full detail at /dashboard/bookings/[id]
From the email notification
- Accept and charge — capture payment
- Propose other dates — opens the reschedule page with a secure token
- Reject — decline without charging
- View full details / Manage booking — opens booking detail
If Google Calendar is connected, use Re-sync Google Calendar on the Bookings page when something looks out of date.
Languages and go-live checklist
EN/ES dashboard, multi-language widget, and final checks for Espeto Diving.
Languages
- Dashboard — switch EN / ES in the navbar
- Customer widget — en, es, de, fr via the URL language segment
- Emails — sent in the customer’s language when available
- Auto-translate — optional on Activities (needs OpenAI key on the server)
Go-live checklist for Espeto Diving
- Center account created and you can log in
- At least one activity with correct price and capacity
- Availability rules covering the next 2–4 weeks
- 7-day trial or active subscription started
- Stripe Connect completed (Stripe account ready)
- Widget colors/logo saved and domain allowlisted
- Embed code pasted on the live website
- Test booking in the widget (use a real card in test or a low-price dry run)
- Practice Accept / Reject / Reschedule once